Behind the scenes, I’m often tinkering with my coin photography studio setup to either try some new technique or to find ways to improve. Sometimes it’s about getting a better photo but often I’m also exploring ways to make it easier and faster for me to take photos or edit them. I’m going to try to start writing down some of these developments in a more informal blog post style compared to my usual “Articles”. I want a way to share my ideas and findings with others and also receive feedback and suggestions from anyone interested enough to read this!
To start with, I’m going to detail a recent investigation I did into improving one of the mainstays of my setup over the last couple of years: my custom 3D-printed “pseudo-axial” flash adapter. This flash adapter mounts to the end of my lens and is meant to recreate an axial lighting-like effect where the light from the camera flash illuminates the coin at a near 90-degree angle relative to the surface of the coin. This means the light is parallel (in-axis) to the lens and perpendicular to the coin. This concept is commonly used in coin photography as well as industrial manufacturing and QA because it provides high contrast without needing to create shadows through off-axis lighting. It also tends to bring out toning extremely well and can evenly illuminate the coin while avoiding flatness.
Why Axial Lighting
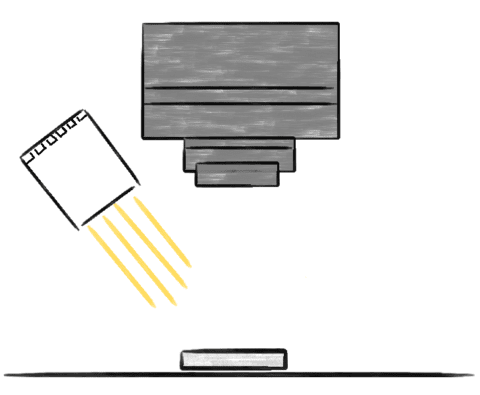
My goals with lighting for coin photography are mainly reduced to: (a) recreate the axial lighting effect as close as possible, and (b) modify the lighting slightly to reduce the harshness of this effect while keeping its benefits. In other words, replicate axial lighting without the bad parts. Axial lighting is where the light hitting the object is parallel to the axis of the camera lens, i.e. the light is hitting the object at a perpendicular (90 degree) angle, which by the law of reflection means the light reflecting back is also at 90 degrees and goes straight back to the camera. I’ve written about axial lighting and pseudo-axial lighting with ring lights before so if you know the basics, feel free to skip this section. The following images might help conceptualise what I mean by axial lighting and off-axis lighting:
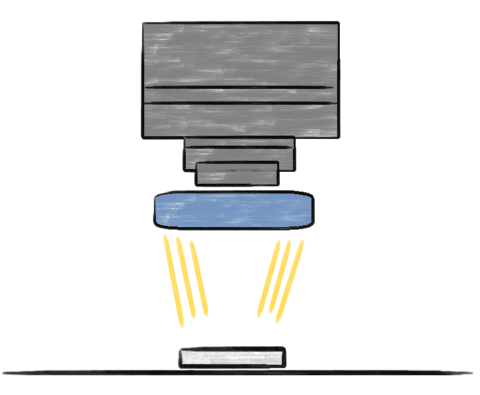
If you aren’t familiar with axial lighting, it’s worth covering its several benefits. First, light hitting the coin perfectly perpendicularly (i.e. from straight-down) creates contrast by varying how much light is reflected to the camera based on the contours of the coin. The fields of the coin are mostly flat so they reflect most of the light back to the camera, producing bright fields that bring out the toning of the coin and features like flow lines and lustre. Parts of the coin with bumpy surfaces, like a portrait, reflect different amounts of light back. Flat areas like the cheek might reflect a lot of light, while the edges of the portrait reflect most light away because they are angled. This means the edges of the portrait are darker than the main parts of the portrait, creating contrast between the portrait and fields of the coin. However, the portrait is not uniformly bright, the slight variations in surface flatness reflect different amounts of light, slightly darkening contoured areas and accurately capturing the depth of the features. You can see an example of this in this axially-lit photo.
Second, axial lighting provides consistency to your photos. You don’t have to worry about getting the angle of the lighting just right or recreating the precise setup you used the previous weekend, instead it should be relatively easy to replicate the exact same lighting conditions.
Third, axial lighting doesn’t use shadows to create contrast and thus you don’t risk losing detail due to insufficient light in some areas. Typically people use shadows to create contrast and depth in their coin photos by having the light at an angle relative to the coin. Some light will be blocked by the features of the coin, producing shadows on the opposite side of those features. This can make for inconsistent photos due to the shadows varying between coins and also you can obscure detail or make it hard to see by covering it in shadows. Axial lighting only produces the harshest shadows in areas that are parallel to the light source, almost everything else will reflect *some* light, it will just be less bright than other areas.
Lastly, blown-out highlights are limited and easy to control. When using off-axis lighting from an angle, it’s very easy to produce bright white areas on the tops of portraits. Axial lighting doesn’t have this issue because it’s much easier to evenly light the entire coin since each part of the coin is receiving the same amount of light. When you’re lighting off-axis you often have to increase the light power to get parts of the coin furthest from the light to appear bright enough on the camera.
Downsides of Axial lighting
So, if axial lighting is so good, what’s the problem? The main problem with axial lighting is getting the light to be axial to the lens. You can’t put a light inside the lens itself, only around the lens. But if the light is around the lens and the coin is aligned with the centre of the lens, how do you get axial light – surely the light can only hit the coin at an angle? This is exactly the problem.
As mentioned before, the idea is to place a mirror or piece of glass between the lens and the coin at a 45 degree angle. You can then reflect horizontal light off of the glass, down onto the coin at a 90 degree angle, which then reflects back up towards the camera.
There are two problems with this: (1) putting a piece of glass between the lens and coin introduces optical aberrations and defects. You lose sharpness, ability to resolve detail in the coin, and may have other optical issues like chromatic aberrations. (2) you need a lot of light. If your mirror reflects 50% light and transmits 50% light, when the light first hits the mirror you only have 50% of it being reflected to the coin, and when the light reflects off of the coin back to the camera, only 50% of that is transmitted through the mirror. This means only 25% of your original light actually makes it to the camera.
Current solution
To avoid these problems, I’ve been trying something called “pseudo-axial lighting”, which means trying to get the light as axial as possible without using the mirror method above and avoiding the issues it introduces. My idea was to recreate a ring light except one powered by a camera flash. It would be mounted around the lens and try to reflect light down onto the coin at a slight angle, achieving most of the axial effect. The light would be reflected at an angle and not exactly perpendicularly because a ring light, by definition, is a ring and has a hole in the middle of it allowing the lens to see the coin. As my lens is about 65mm in diameter and the coin typically less than 30mm, this means the light from the ring can only hit the coin at an off-axis angle. However, the hope is that it still hits the coin at an angle high enough to reproduce the axial effect, hence “pseudo-axial”.
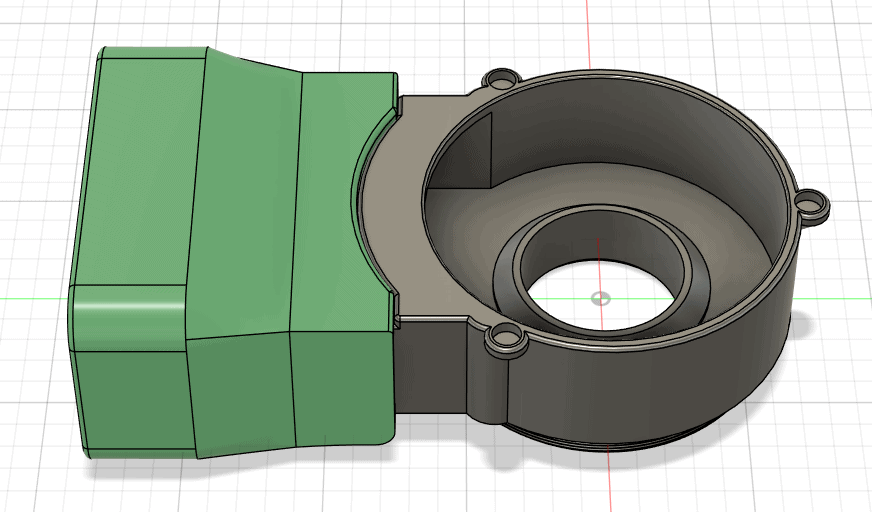
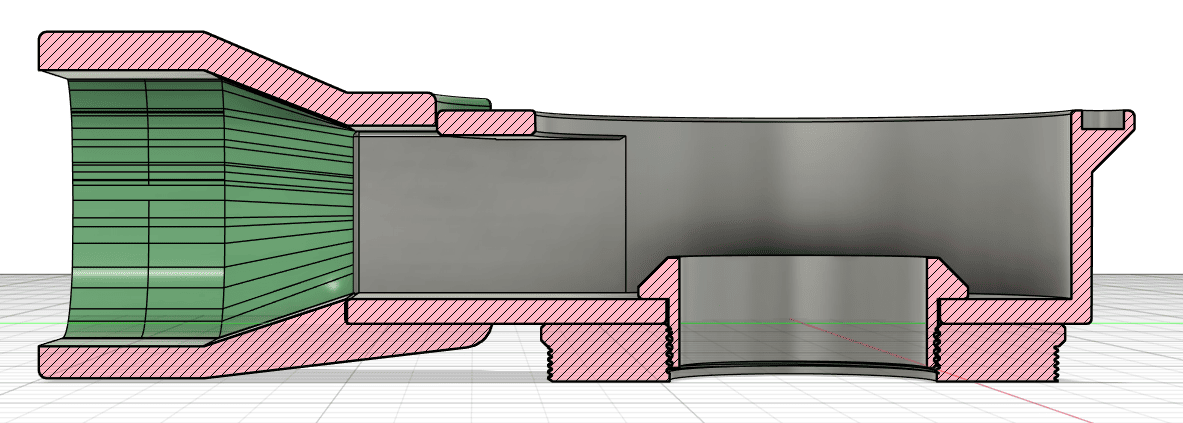
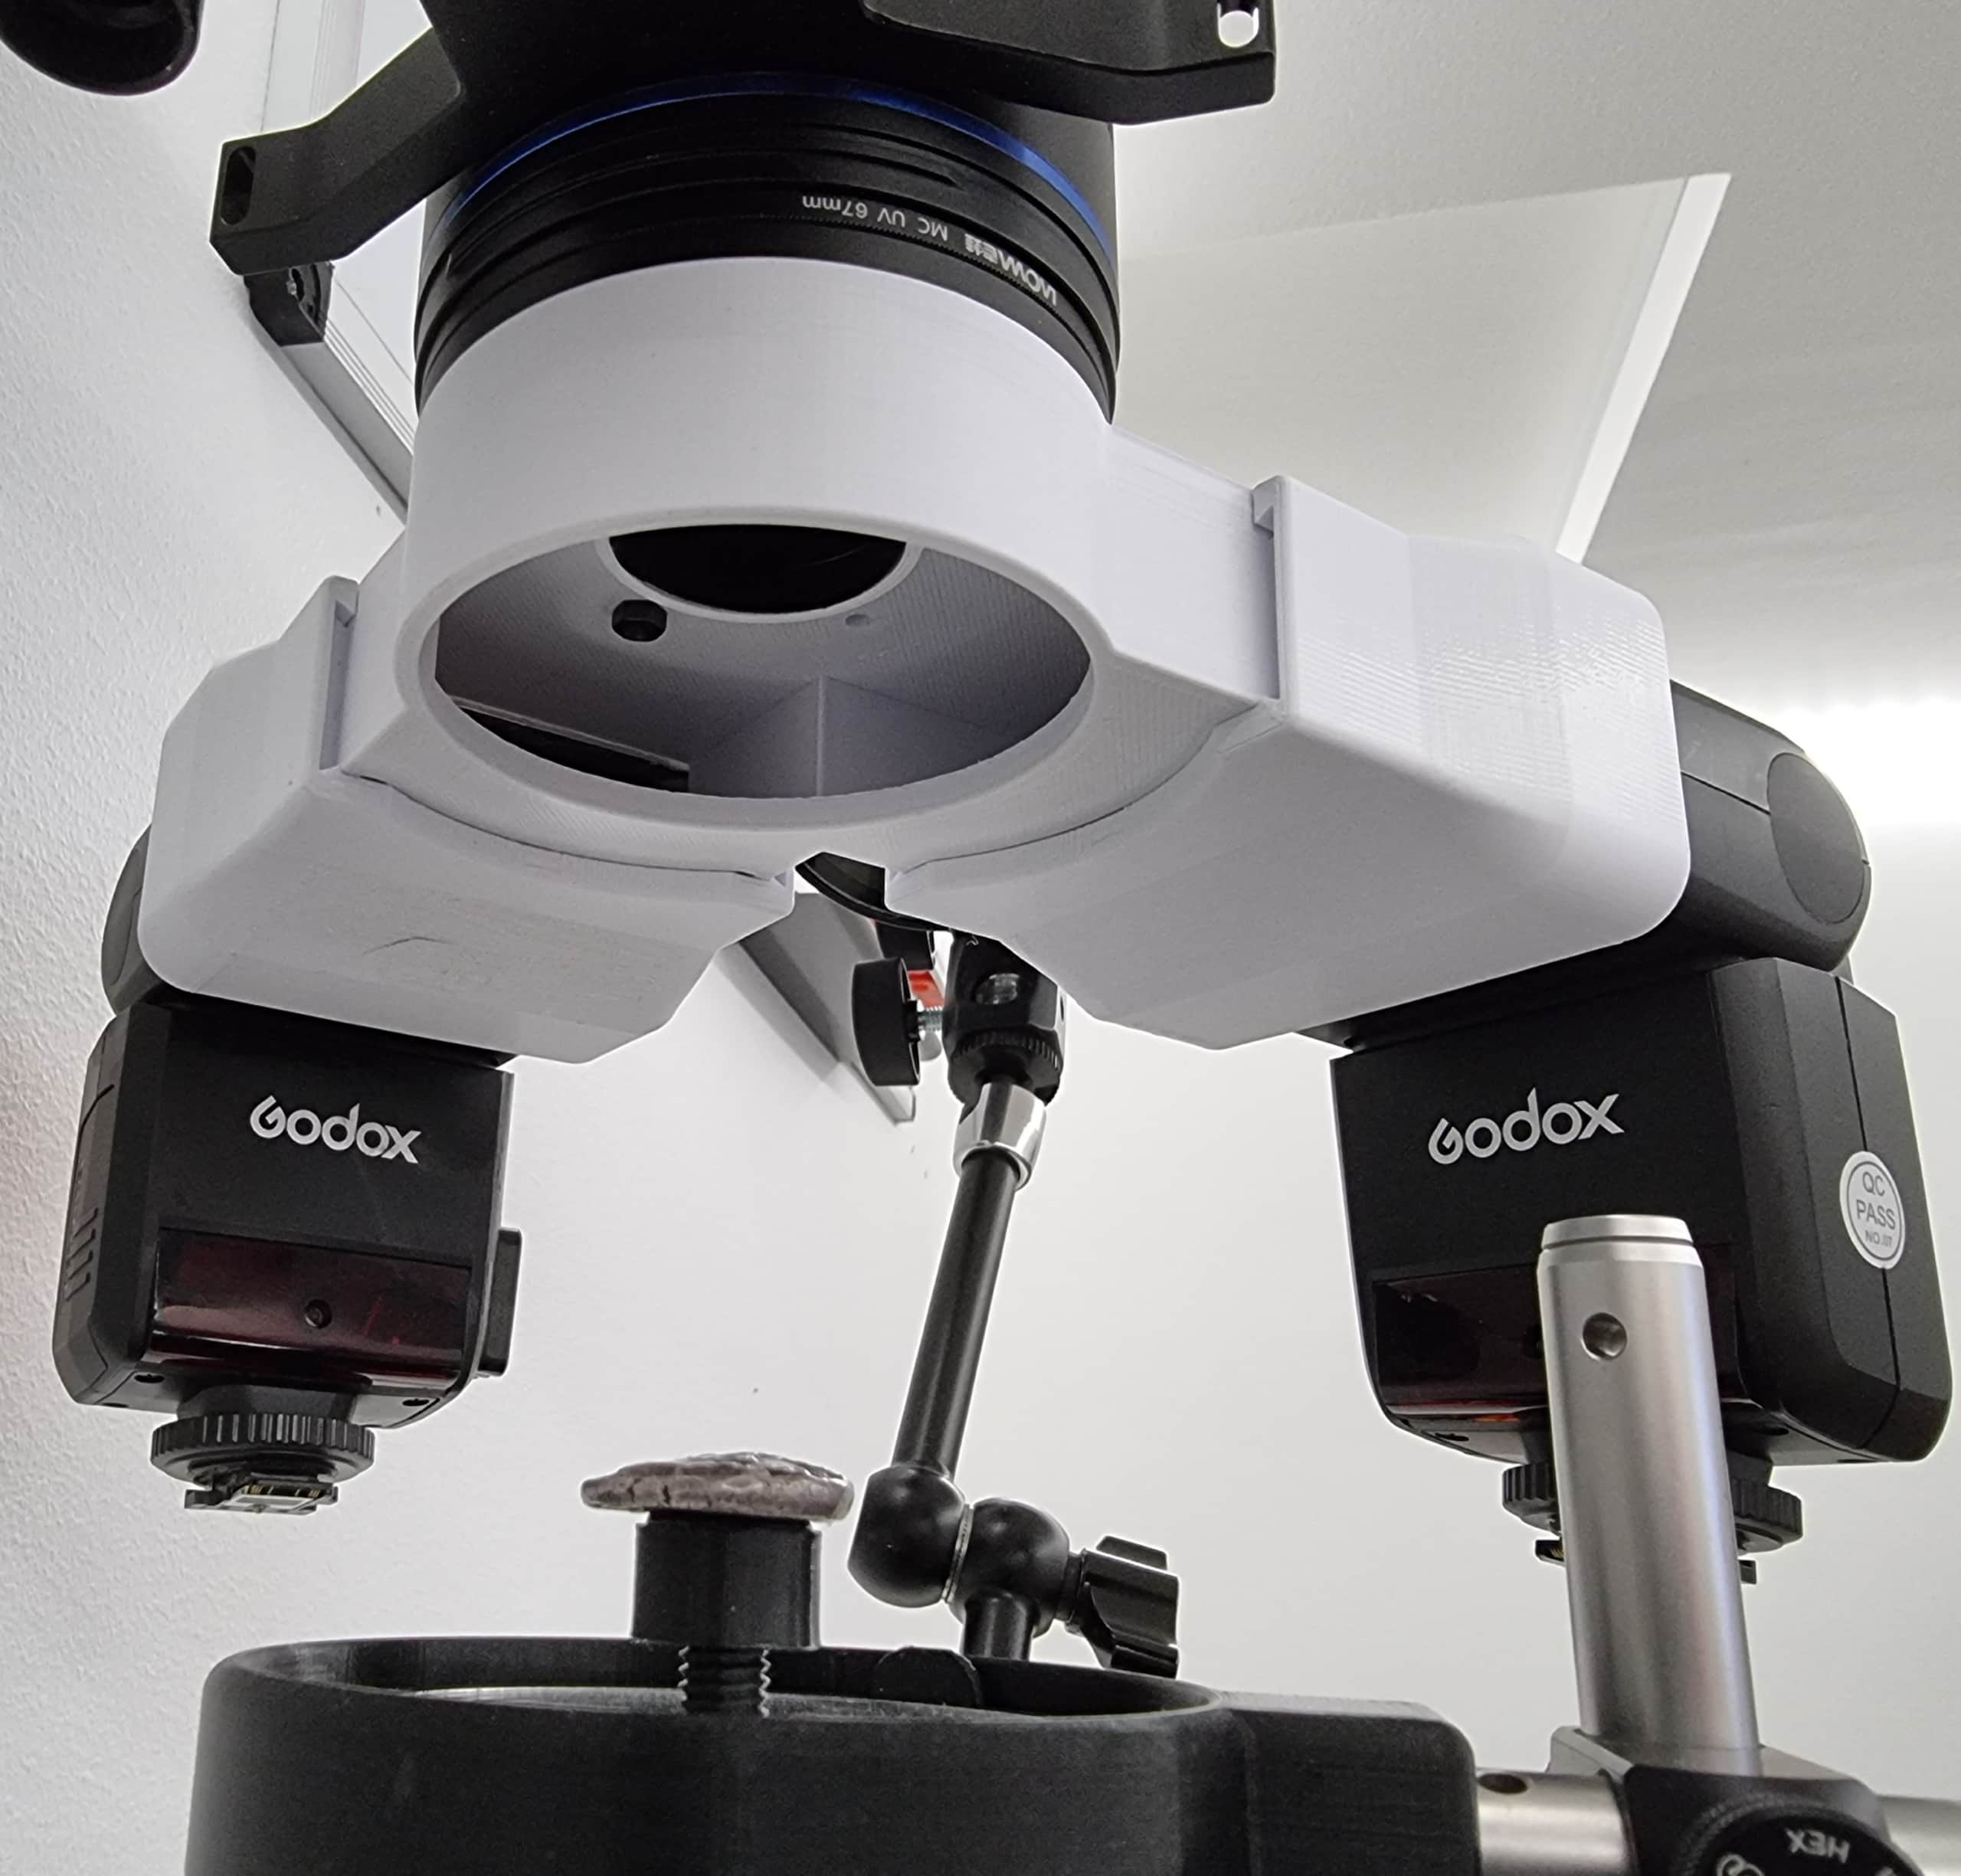
So the goal with my current flash adapter was to get light from the flash down onto the coin at the highest angle possible. This means minimising the “hole” in the centre of the ring light and helping that light reflect onto the coin. Even though the lens is about 65mm in diameter, I only need a hole about 30mm wide in the centre of the ring light as that still provides a large enough field of view to see the full coin placed about 15cm away at 1x magnification. The image below shows a dual flash version of my adapter, the same as the single flash version except with an additional flash placed 90 degree rotated to the other lens. In the centre you can see a hole smaller than the diameter of the lens, and lined with black felt, which is the 30mm hole the lens images through to photograph the coin.
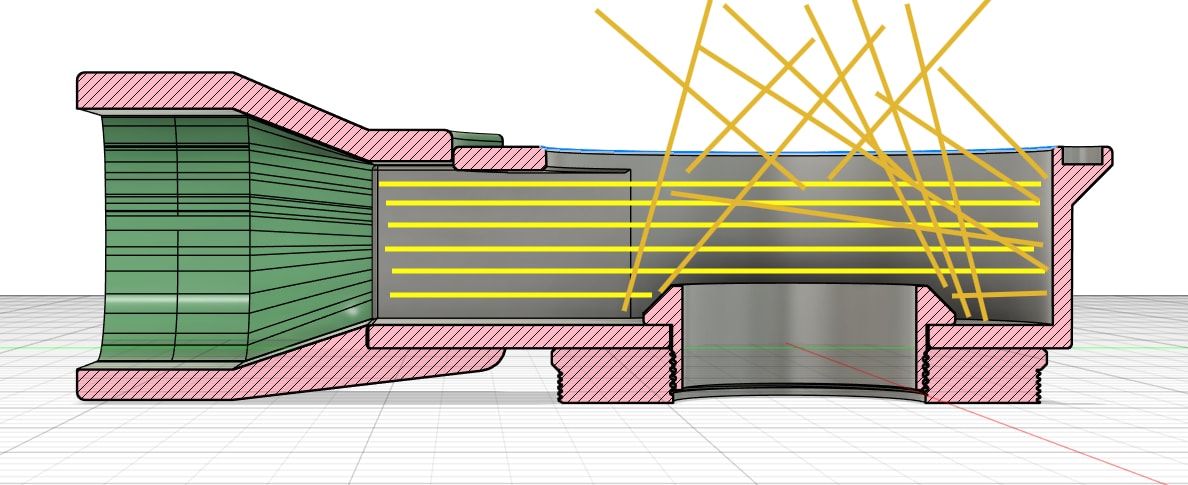
Even with the smaller hole in the middle of the ring light, this device is still not going to reflect light perfectly downwards to the coin. Light comes in horizontally from the flash head and hits the grey cylinder, reflecting light in countless different directions, some of which will exit the cylinder and go towards the coin. One hopes that at least some of this light is hitting the coin roughly axial to the lens but a lot of light is not going to be. This non-axial light will lessen the axial effect by providing diffused rather than direct reflections. This isn’t all bad, however, as the axial effect can be too contrasty at times and some diffused light is useful to lessen this effect.
Problems with this method
The main problem with this method is the 30mm hole in the middle of the flash adapter that is needed for the lens to see the coin. This hole means no light can be reflected from the flash head towards the centre of the coin from this area. In practice that means more light is hitting areas around the coin then in the middle of the coin. What this means is that you lose the axial effect in the middle of the coin and instead end up with more diffused lighting in that area, which doesn’t produce a lot of contrast or capture the depth and contours of the features.
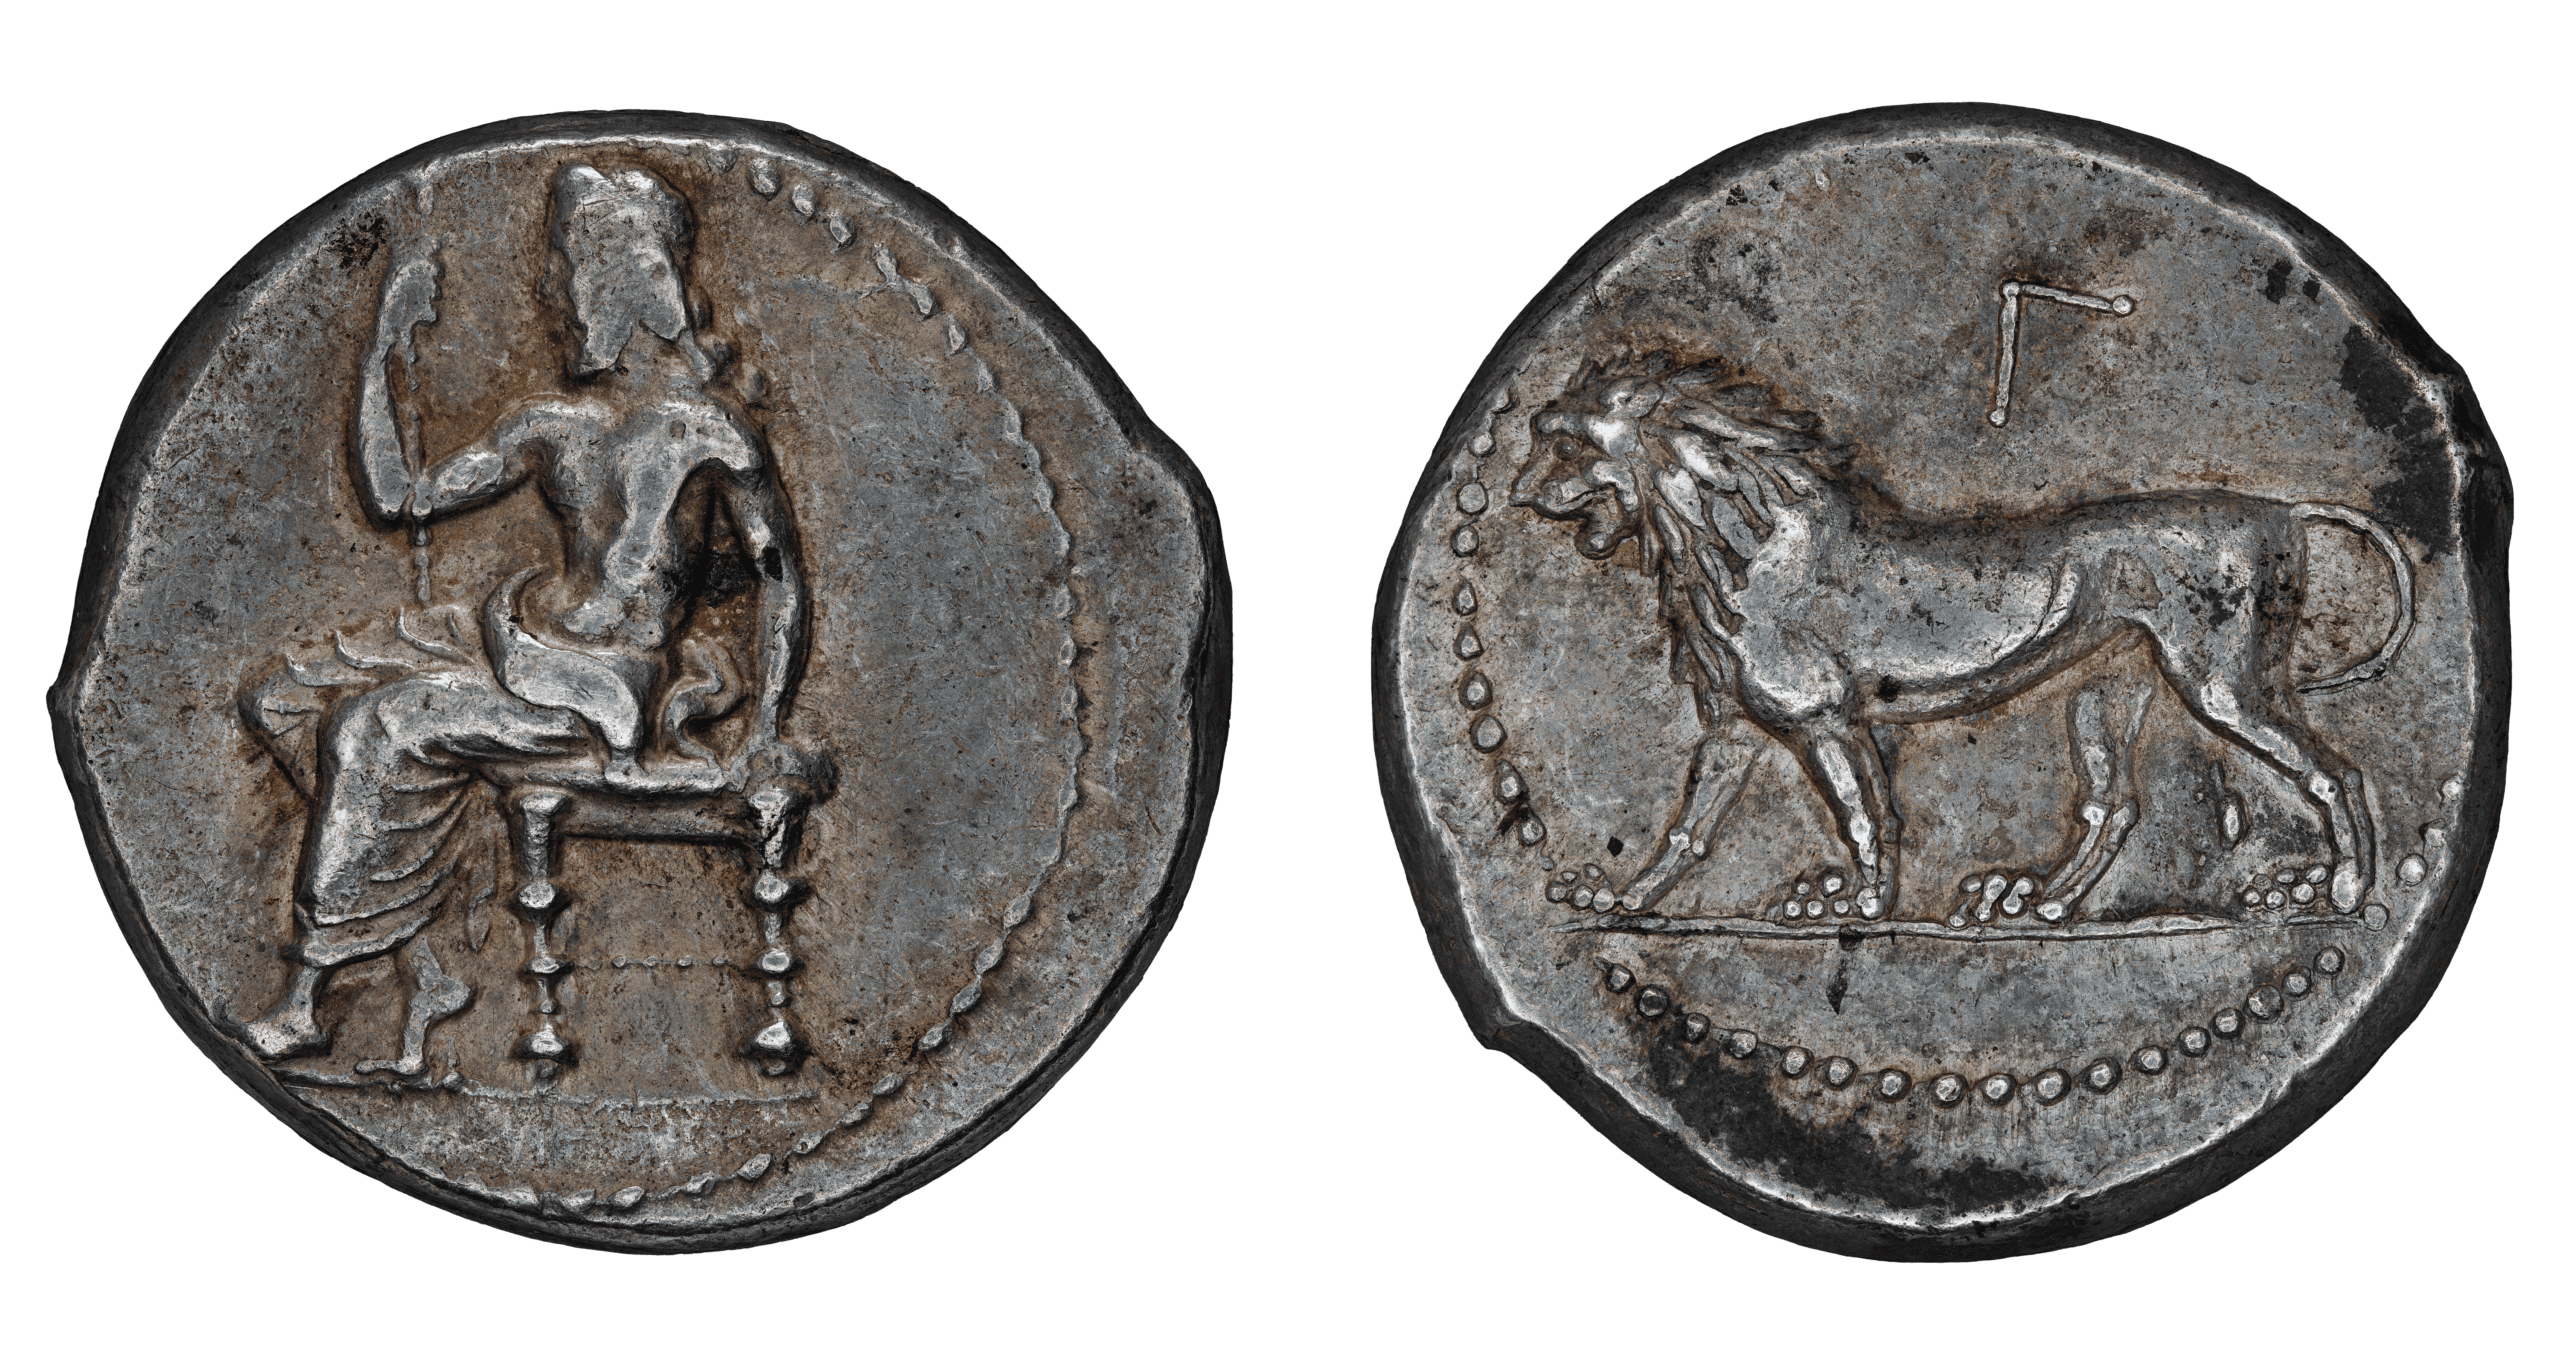
You can see this in the following picture. Look at the side of Baal’s leg, his himation, and the left part of his chest and face. Similarly, on the lion pay attention to the main part of the lion’s body. All of these areas look flat, they all have a similar amount of brightness so our eyes interpret that as meaning these features are all the same distance from our eyes, thus are perceived as flat and lacking depth. In aesthetic terms, I find that this can make the coin in general appear flat, lacking in contrast, and reducing the aesthetic quality of the coin.
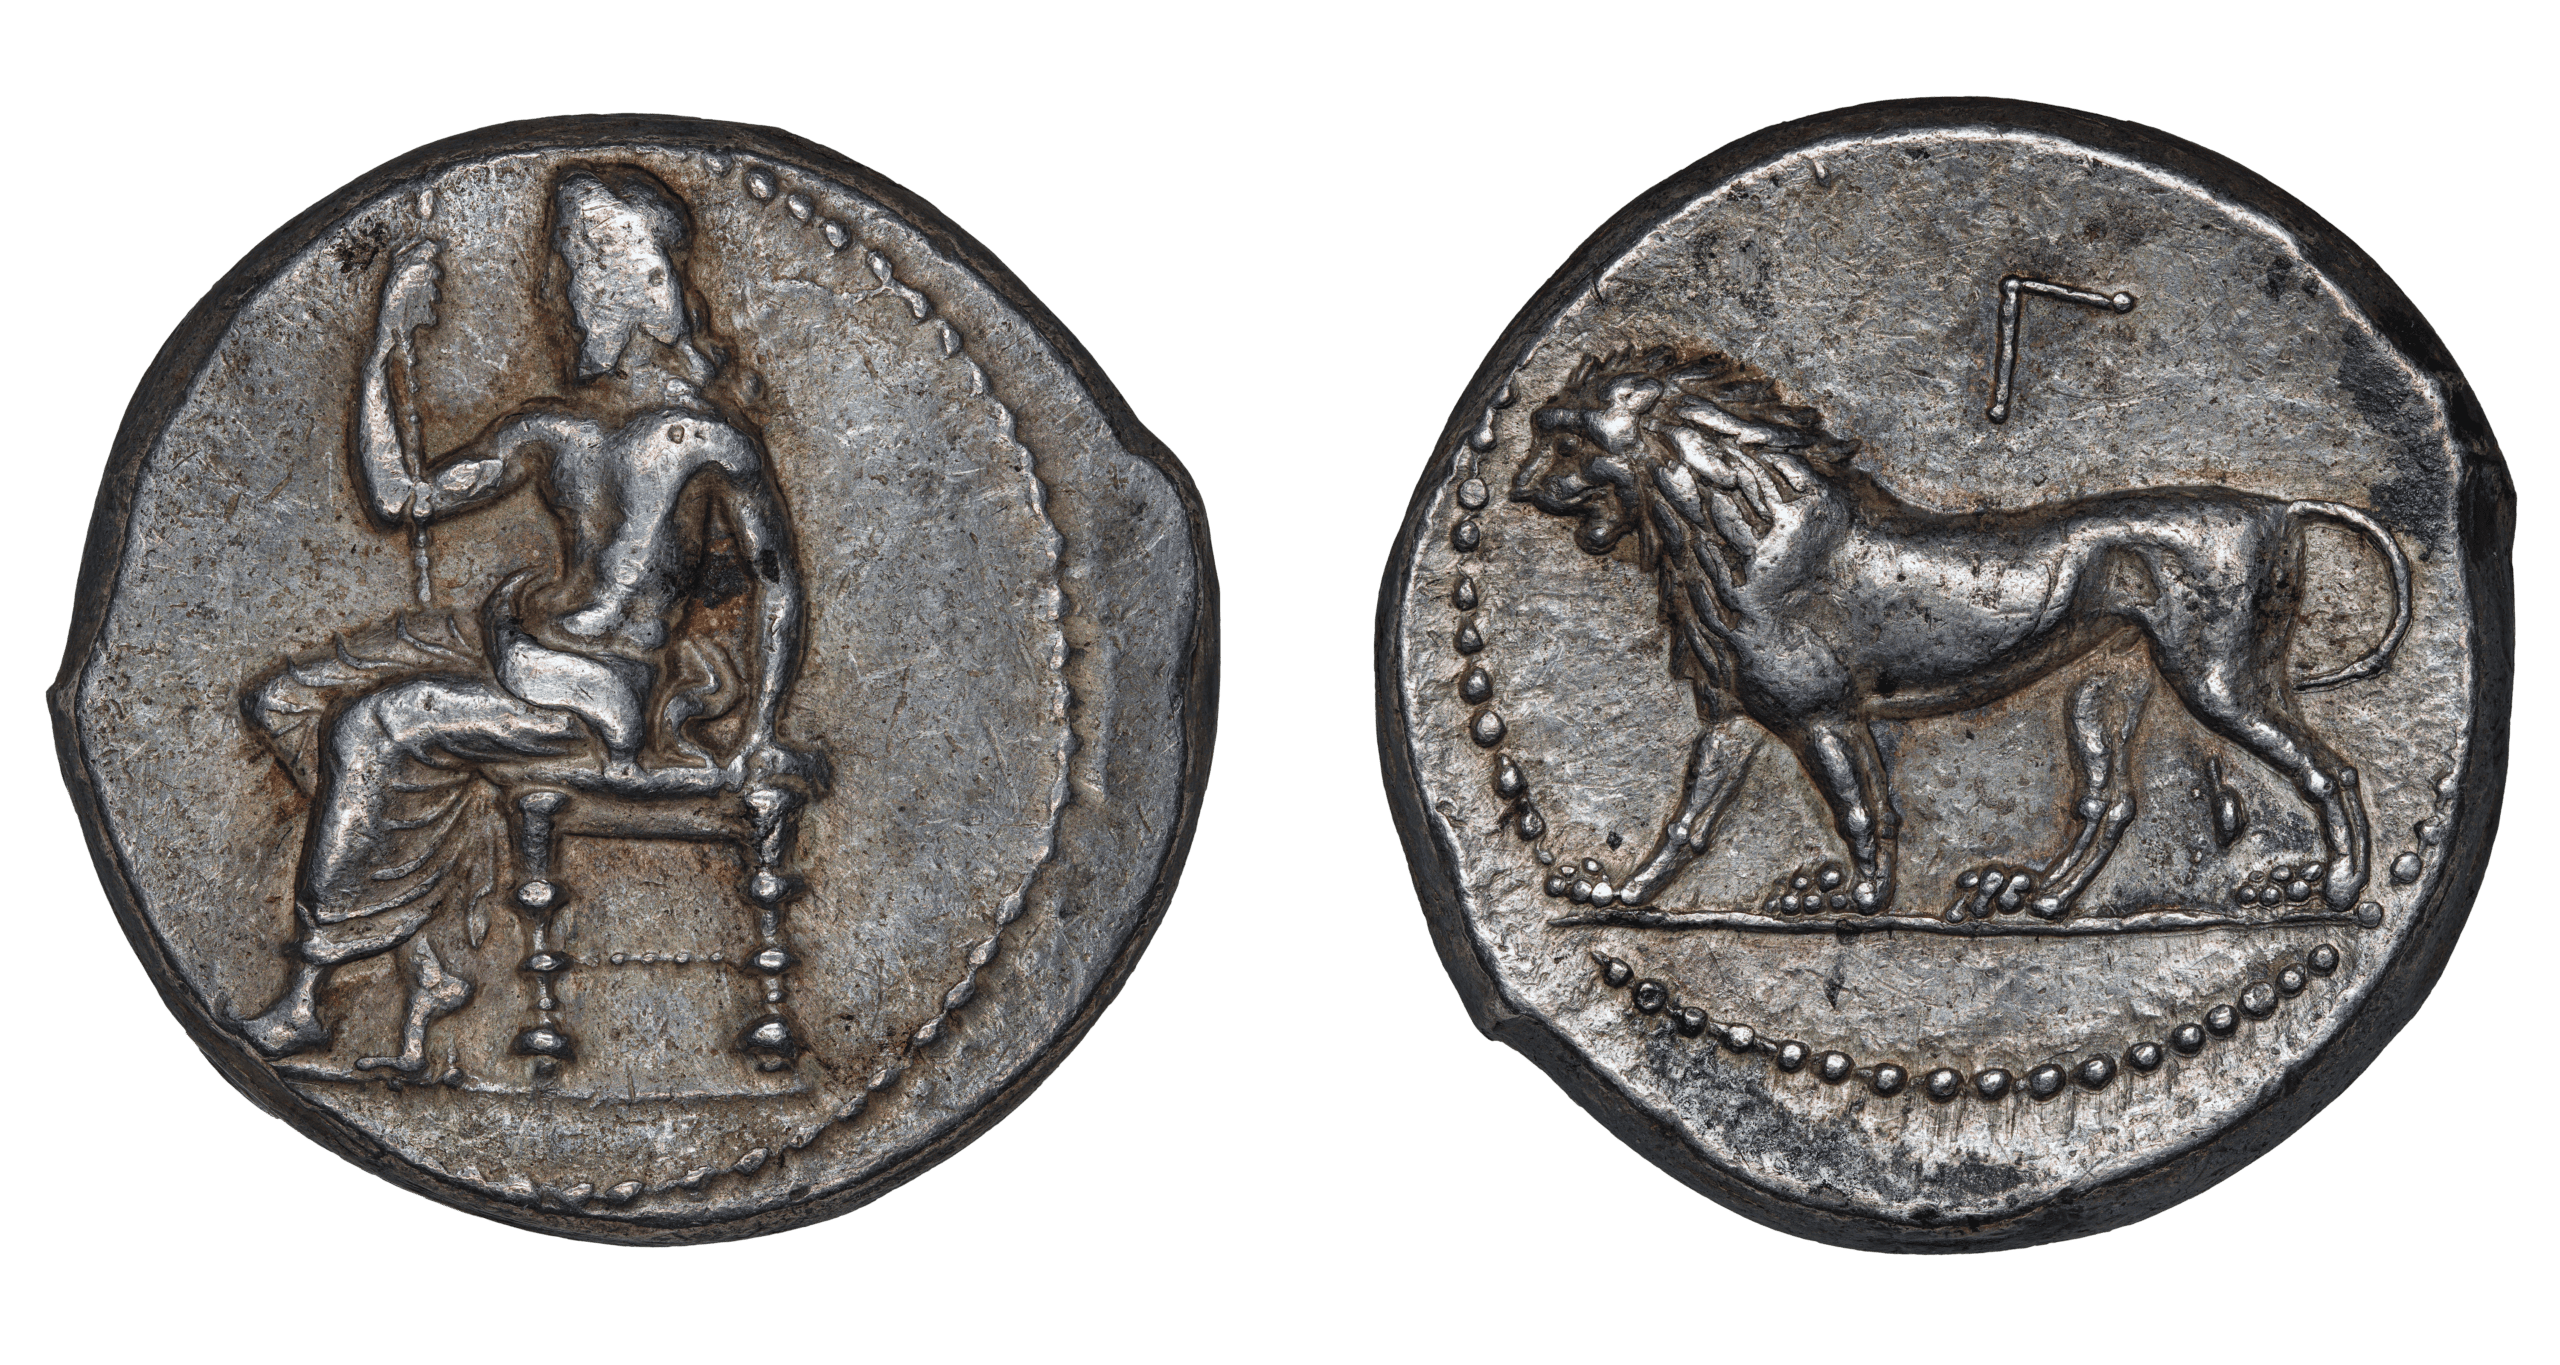
You can contrast this photo, which was taken using the pseudo-axial flash adapter discussed above, with a new photo taken using an adapter I developed as a result of this investigation into a better alternative. The contours of the lion’s shoulder are much more apparent, you can more clearly see the depression between the shoulder and the trunk of the body, as well as how the hindleg isn’t a flat surface but shaped with a depression towards the stomach and a high bony area towards the tail. On Baal, his front leg now takes on a proper cylindrical shape, showing proper light fall-off on the curved areas. His chest likewise displays the depth that would exist between the left side and right side given the twisted position of his body. The face is largely the same but this is the one area that is relatively flat but even then there are some small improvements.
So how did I fixed this? It wasn’t easy. As mentioned, the device requires a hole in the middle so that the lens can see the coin but as long as that hole is there, you can’t have light reflected it from it axially and the middle of the coin has a weakened axial effect. I’ve iterated on this general design many times to try and mitigate the issue. You can see some of these designs below, which probably represent less than half that I’ve tried over the past 2-3 years. The main things I’ve tried are: (1) adding a second flash, hoping that it can light parts of the centre of the coin that the first flash couldn’t, (2) adding modifiers that attach on the outside to help direct light towards the centre, and (3) adding modifiers on the inside like angled surfaces or “spouts” in the middle to help direct light towards the centre. Some of these worked better than others but still aren’t good enough in the end.
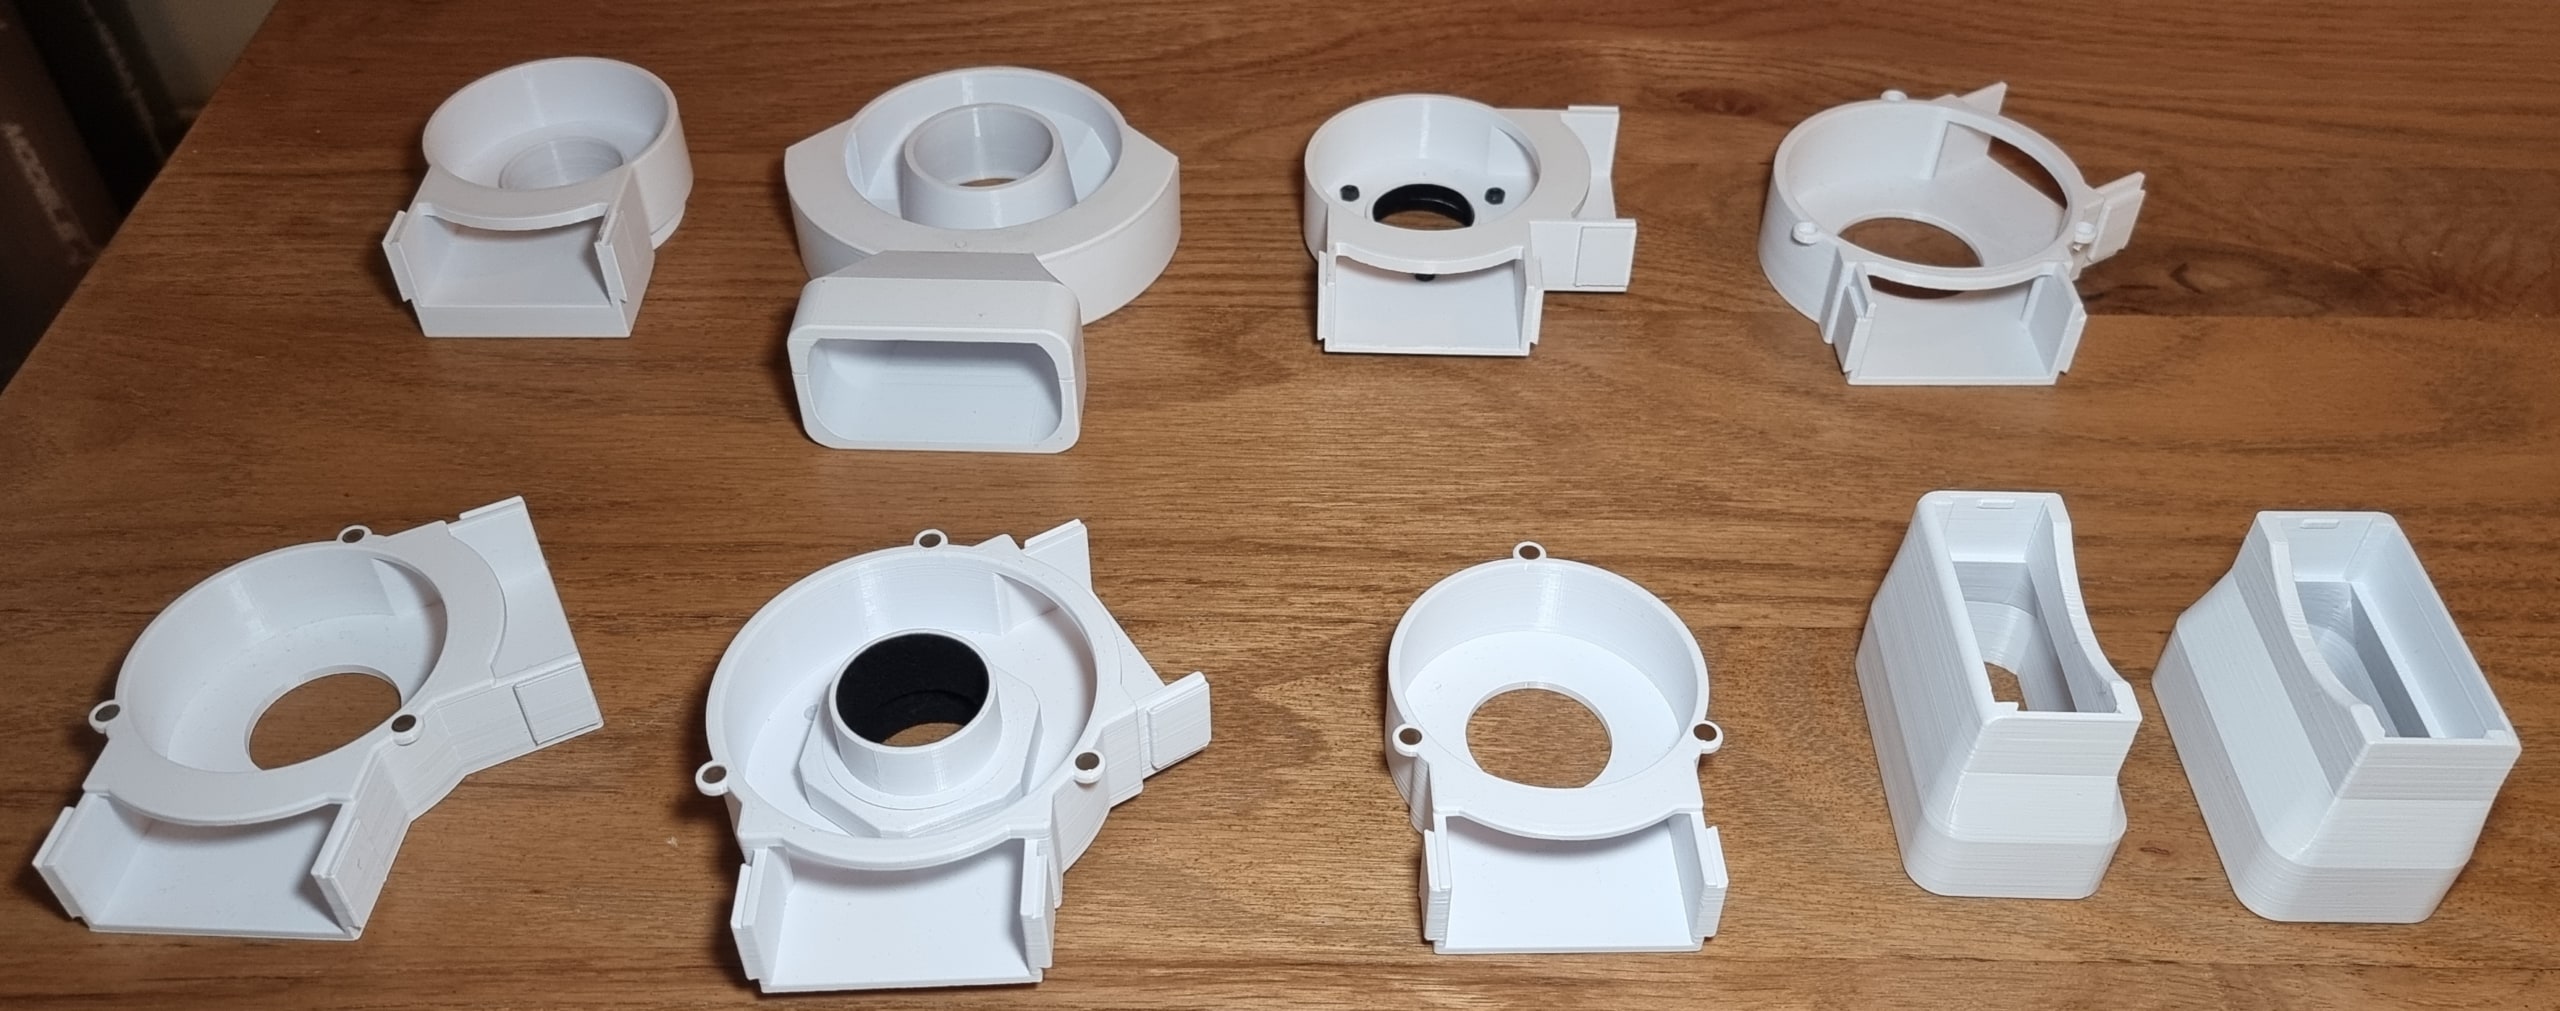
In Part 2, I’ll go into detail on some new design ideas I had that forced me to re-evaluate the core design I had been using for the past 2-3 years.