Initial Setup
It took me a long time to develop an intuitive feeling for the correct lighting for a given coin. These days, I often start with “pseudo-axial” lighting (mentioned here) as that typically provides the best lighting for me in most cases. If the coin has particularly high relief, I will also expect to use my Godox TT350 external flash to help reduce the contrast of the pseudo-axial lighting and give more depth to the photo with a creative use of shadows.
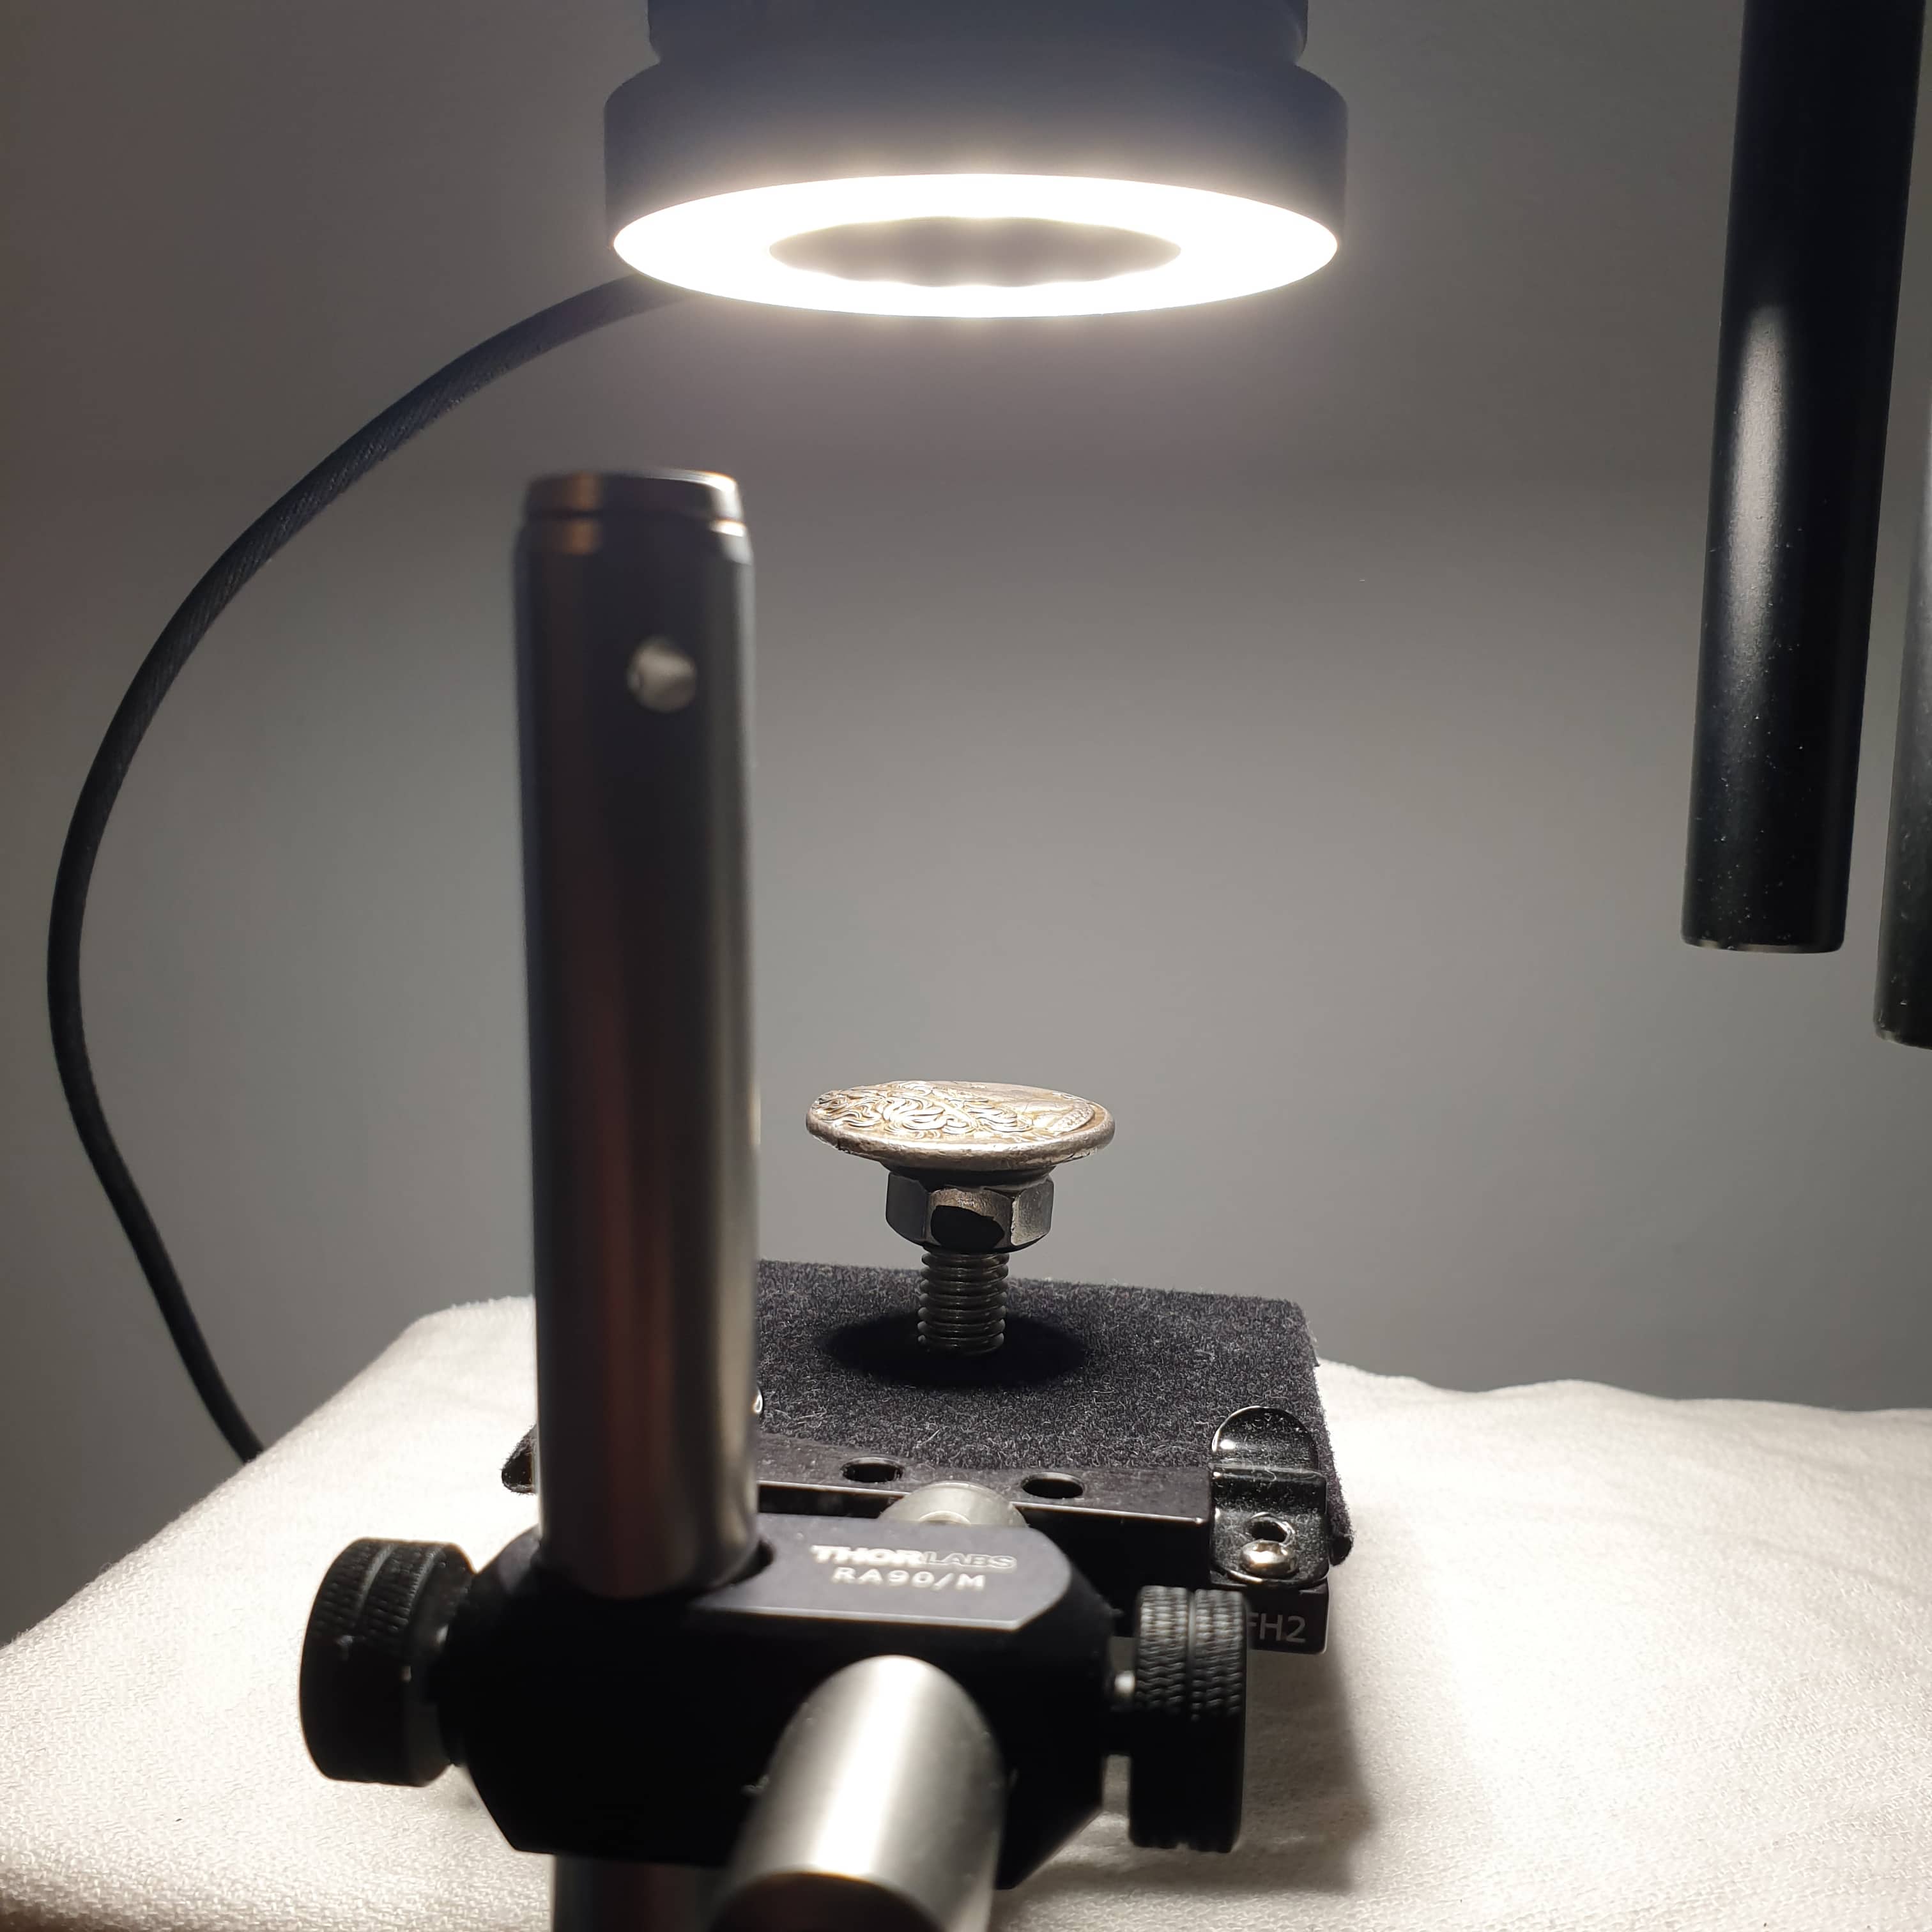
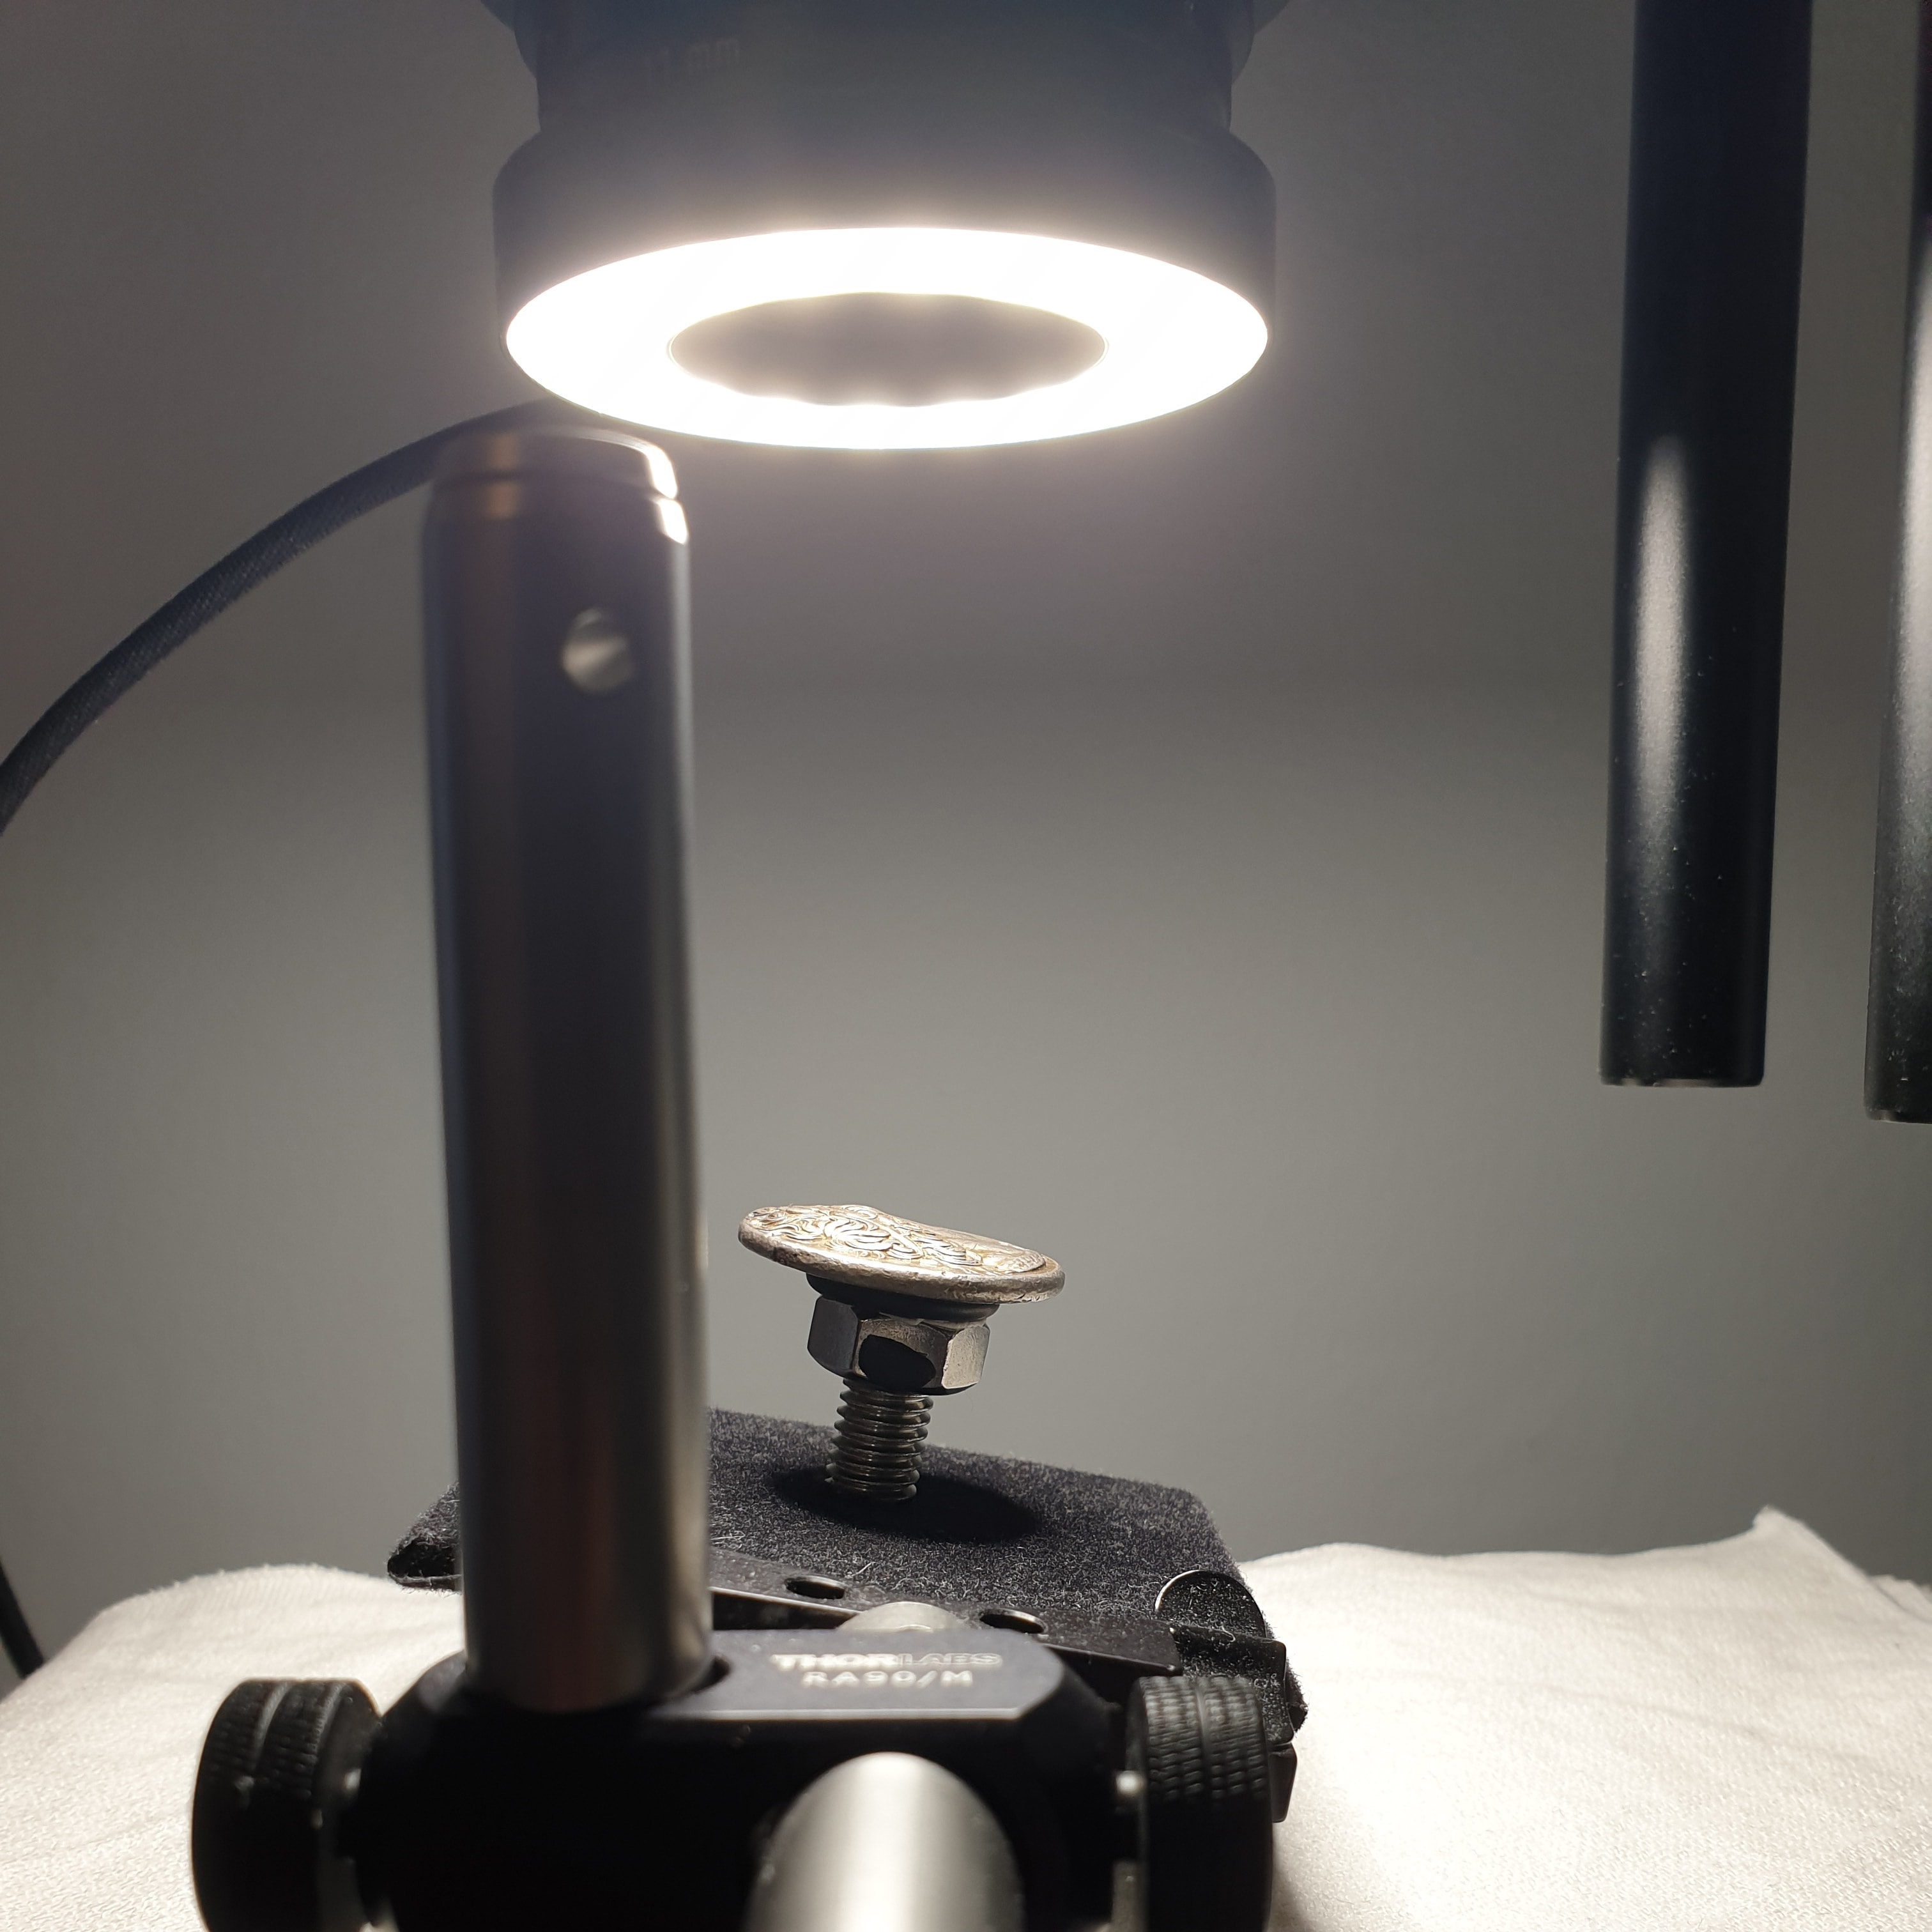
I start by placing the coin on the little pedestal or riser that keeps it above the background. After turning on the lighting (an LED ring light in this case), I observe how the coin looks in the camera display and ask myself a series of questions:
- Is the entire coin evenly lit?
- Are there any blown-out highlights that can’t be balanced out by adjusting the exposure?
- Are there any points that are not well lit and appear extremely dark, if so are these areas that I want to keep dark or brighten?
- If the coin has toning in-the-hand, is the toning replicated in the preview image?
- Are there any flowlines present that do not show up well in the preview?
- Does the coin look “flat” or the the surface dull?
- Is there too much shadow?
These questions and more are worth considering for every photo. You want to make your coin look as best as it can without having to rely too much on saturation, sharpness, contrast, or similar tools during editing. I also tend to aim for a particular style of photo where the coin appears as it might in the hand but with some areas that have more contrast to accentuate a specific feature, such as a portrait, symbol, or legend. I also like to have the edges of the coin bleed into the dark background, which I will talk more about below.
Lighting Adjustments
If I’m not happy with how the coin looks under the current lighting I will first try some tricks to see if I can get it to pop. The first is tilting the coin, either forwards or backwards but not often side-to-side. Tilting the coin produces a similar effect to rotating a coin in-the-hand so it catches the light at the right angle. Particularly with high-angled lighting, a tilt of 3 to 10 degrees can help bring out the toning and colour of a coin as well as any flowlines or other microdetails. Tilting the coin can also diminish any bright spots, particularly on the highest point of a portrait.
Other things I will try include introducing secondary light sources, adding diffusion, or adding reflectors. All three options can tackle the problem of getting light where it needs to be without overpowering the main light. For a secondary light, you could use a small LED panel (e.g. the Godox LED64) or a camera flash with the power settings reduced to the lower levels (e.g. 1/64 or 1/128 in manual mode). Diffusion can help spread the light of your primary or secondary light source and in the case of the latter I will use it to add a touch more light in a certain area without wanting to remove shadow or greatly alter the effect the primary light is providing. For professional diffusion material I recommend Lee filters (e.g. Lee 216) as they’re quite cheap and come in all sorts of specifications with different transmission ratios and colour. In a pinch, you can also use baking paper, tracing paper, or some thin white cloth (e.g. a piece cut from a bed sheet).
Background Separation
How you light your coin can greatly affect how easy it will be to remove the background during editing. If you’re already shooting the coin against a black velvet or dull white material, with the coin raised several centimetres on a pedestal, your coin should have good separation and the background may already appear as one solid colour. However, if you want to completely remove the background in editing and then replace it with an entirely different colour or image, it’s important to ensure the edges of the coin are well lit.
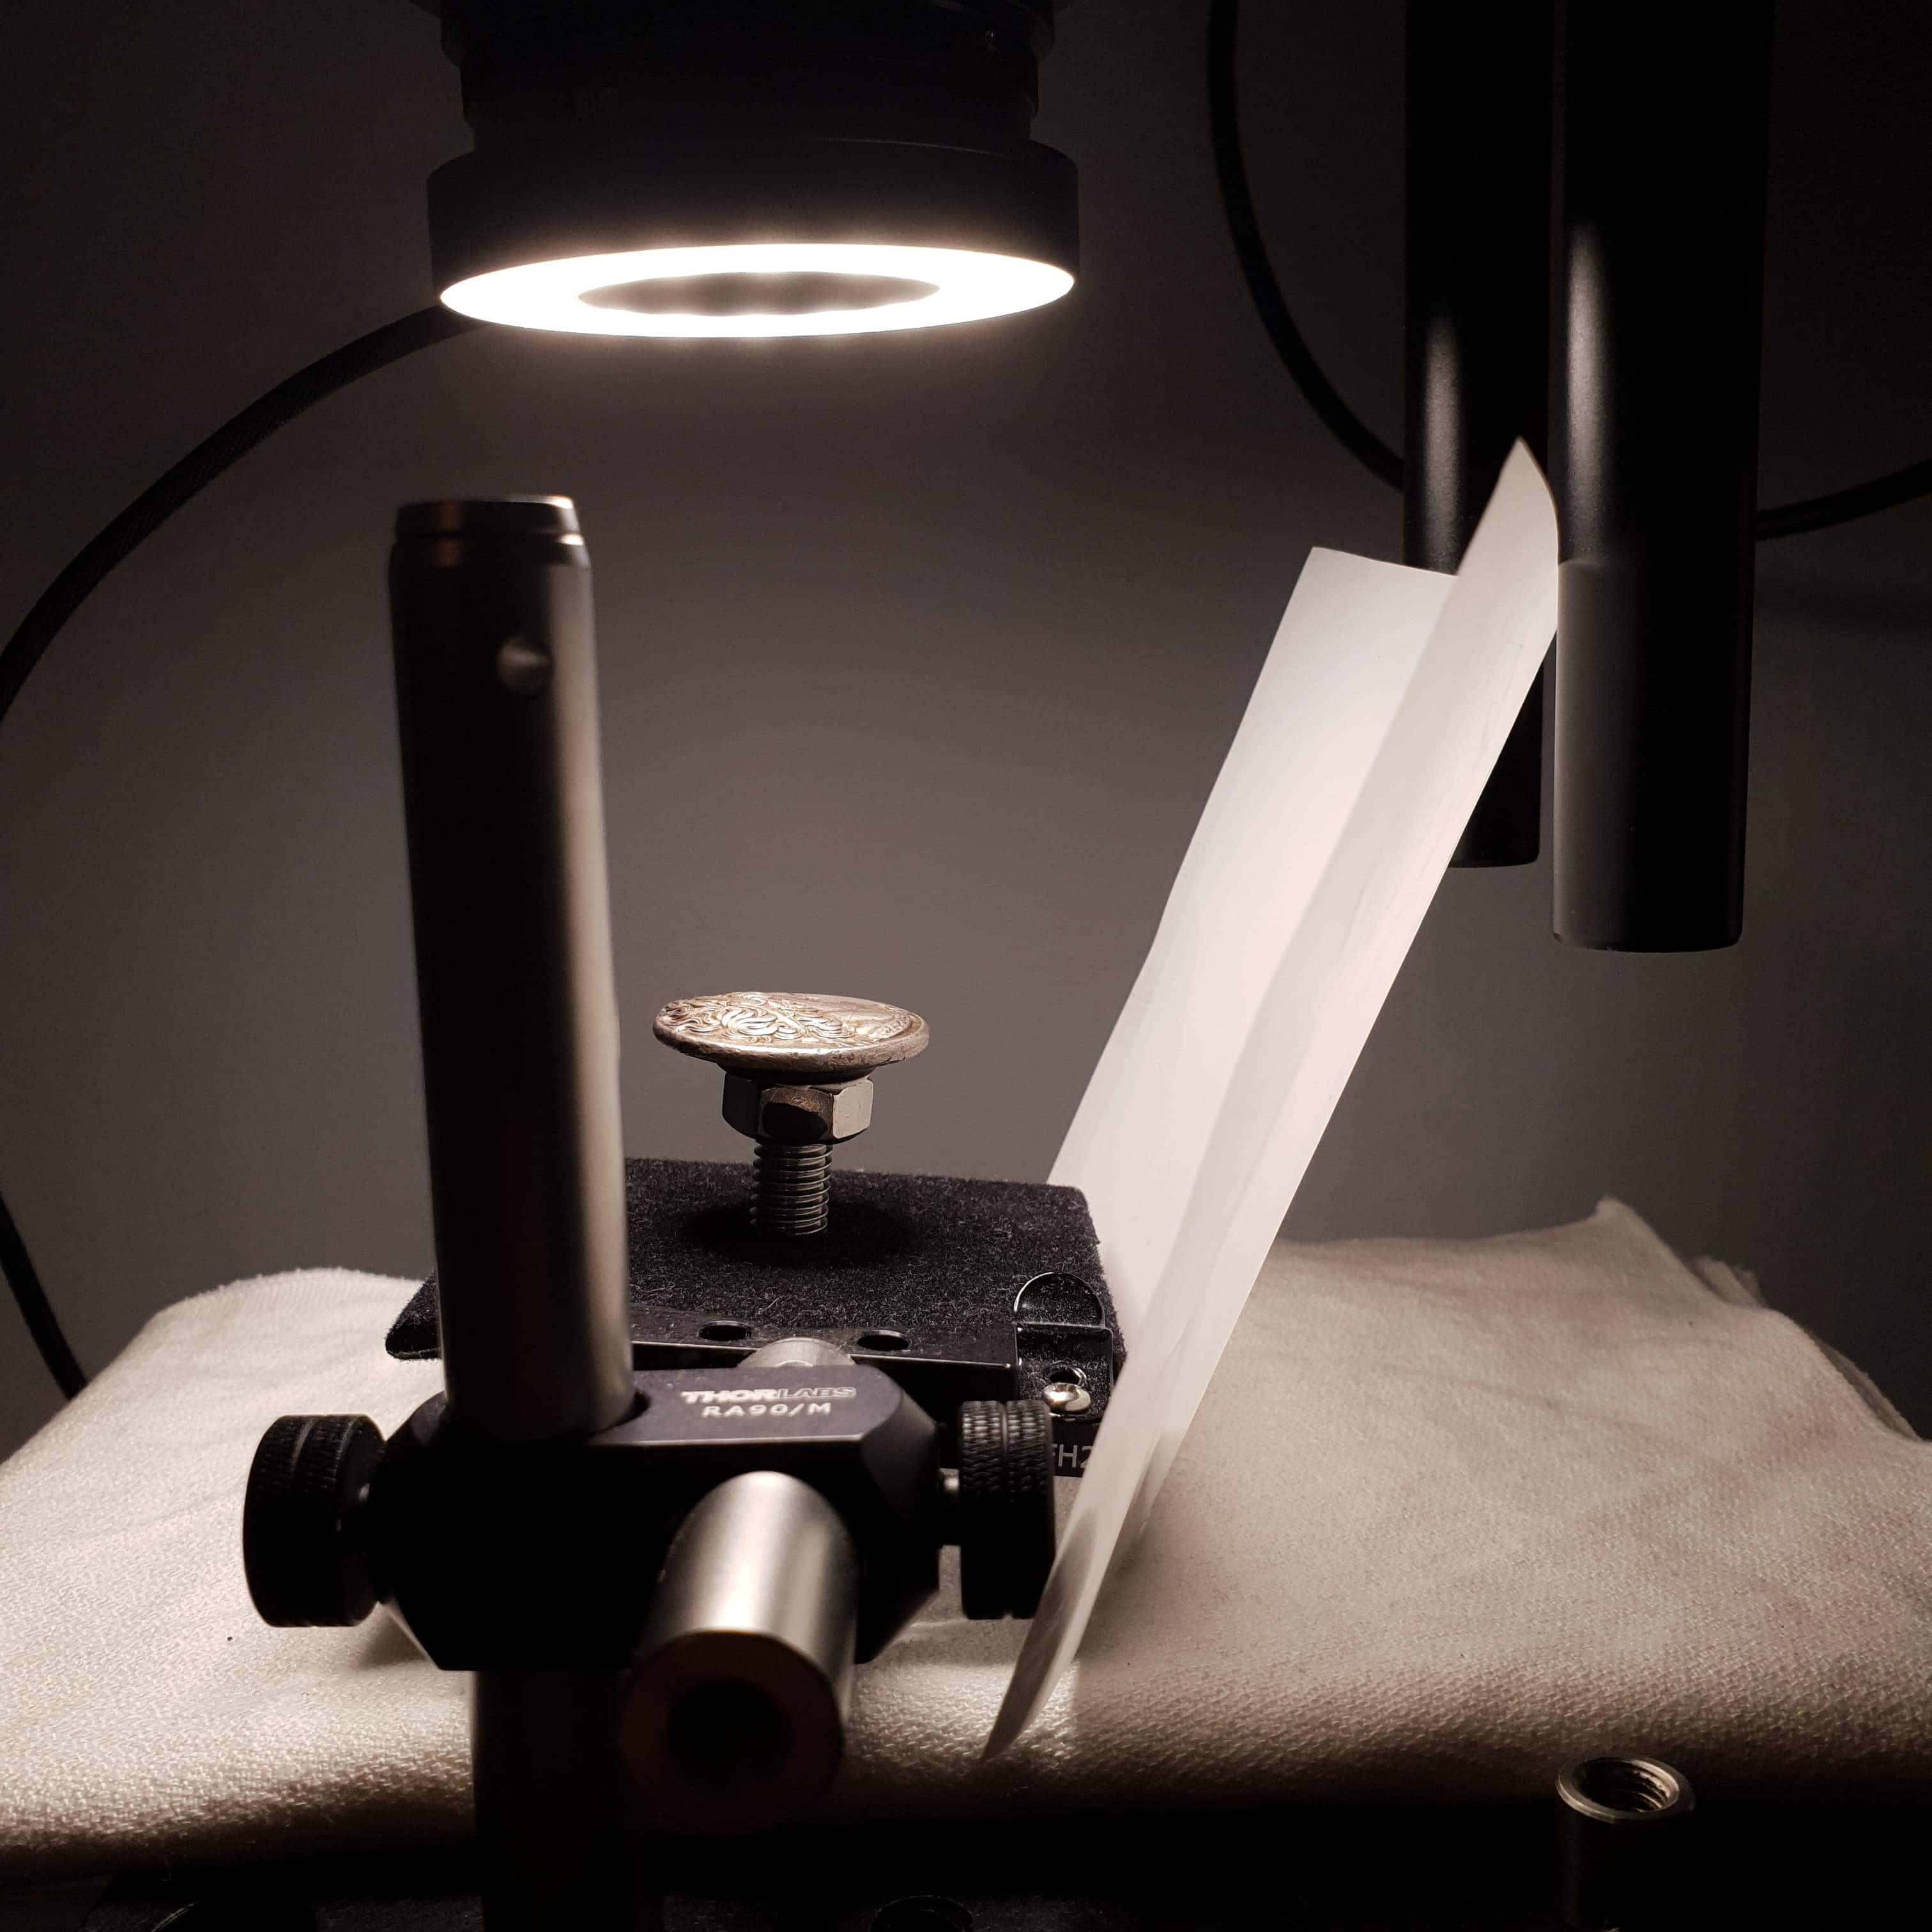
My preference is to bleed the edges into a black background as it helps the coin appear as if it’s a natural part of the photo and not cut-out and pasted onto a plain background. Therefore I don’t often worry about ensuring all edges of the coin are well let, usually I only aim to have the bottom half of the coin’s edges somewhat illuminated to show the thickness of the flan. When using high-angled or pseudo-axial lighting you may need to reflect light onto the edges since most of the light is pointing directly down on the coin. I will use a piece of white paper or diffusion material placed at an angle to the coin to reflect a small amount of light onto the edge. Be careful not to over-do it however, too much reflection can make the edges appear much brighter than the rest of the coin and will stand out in the final image.
Use the arrows to swipe through the photos below.

Different Lighting Arrangements
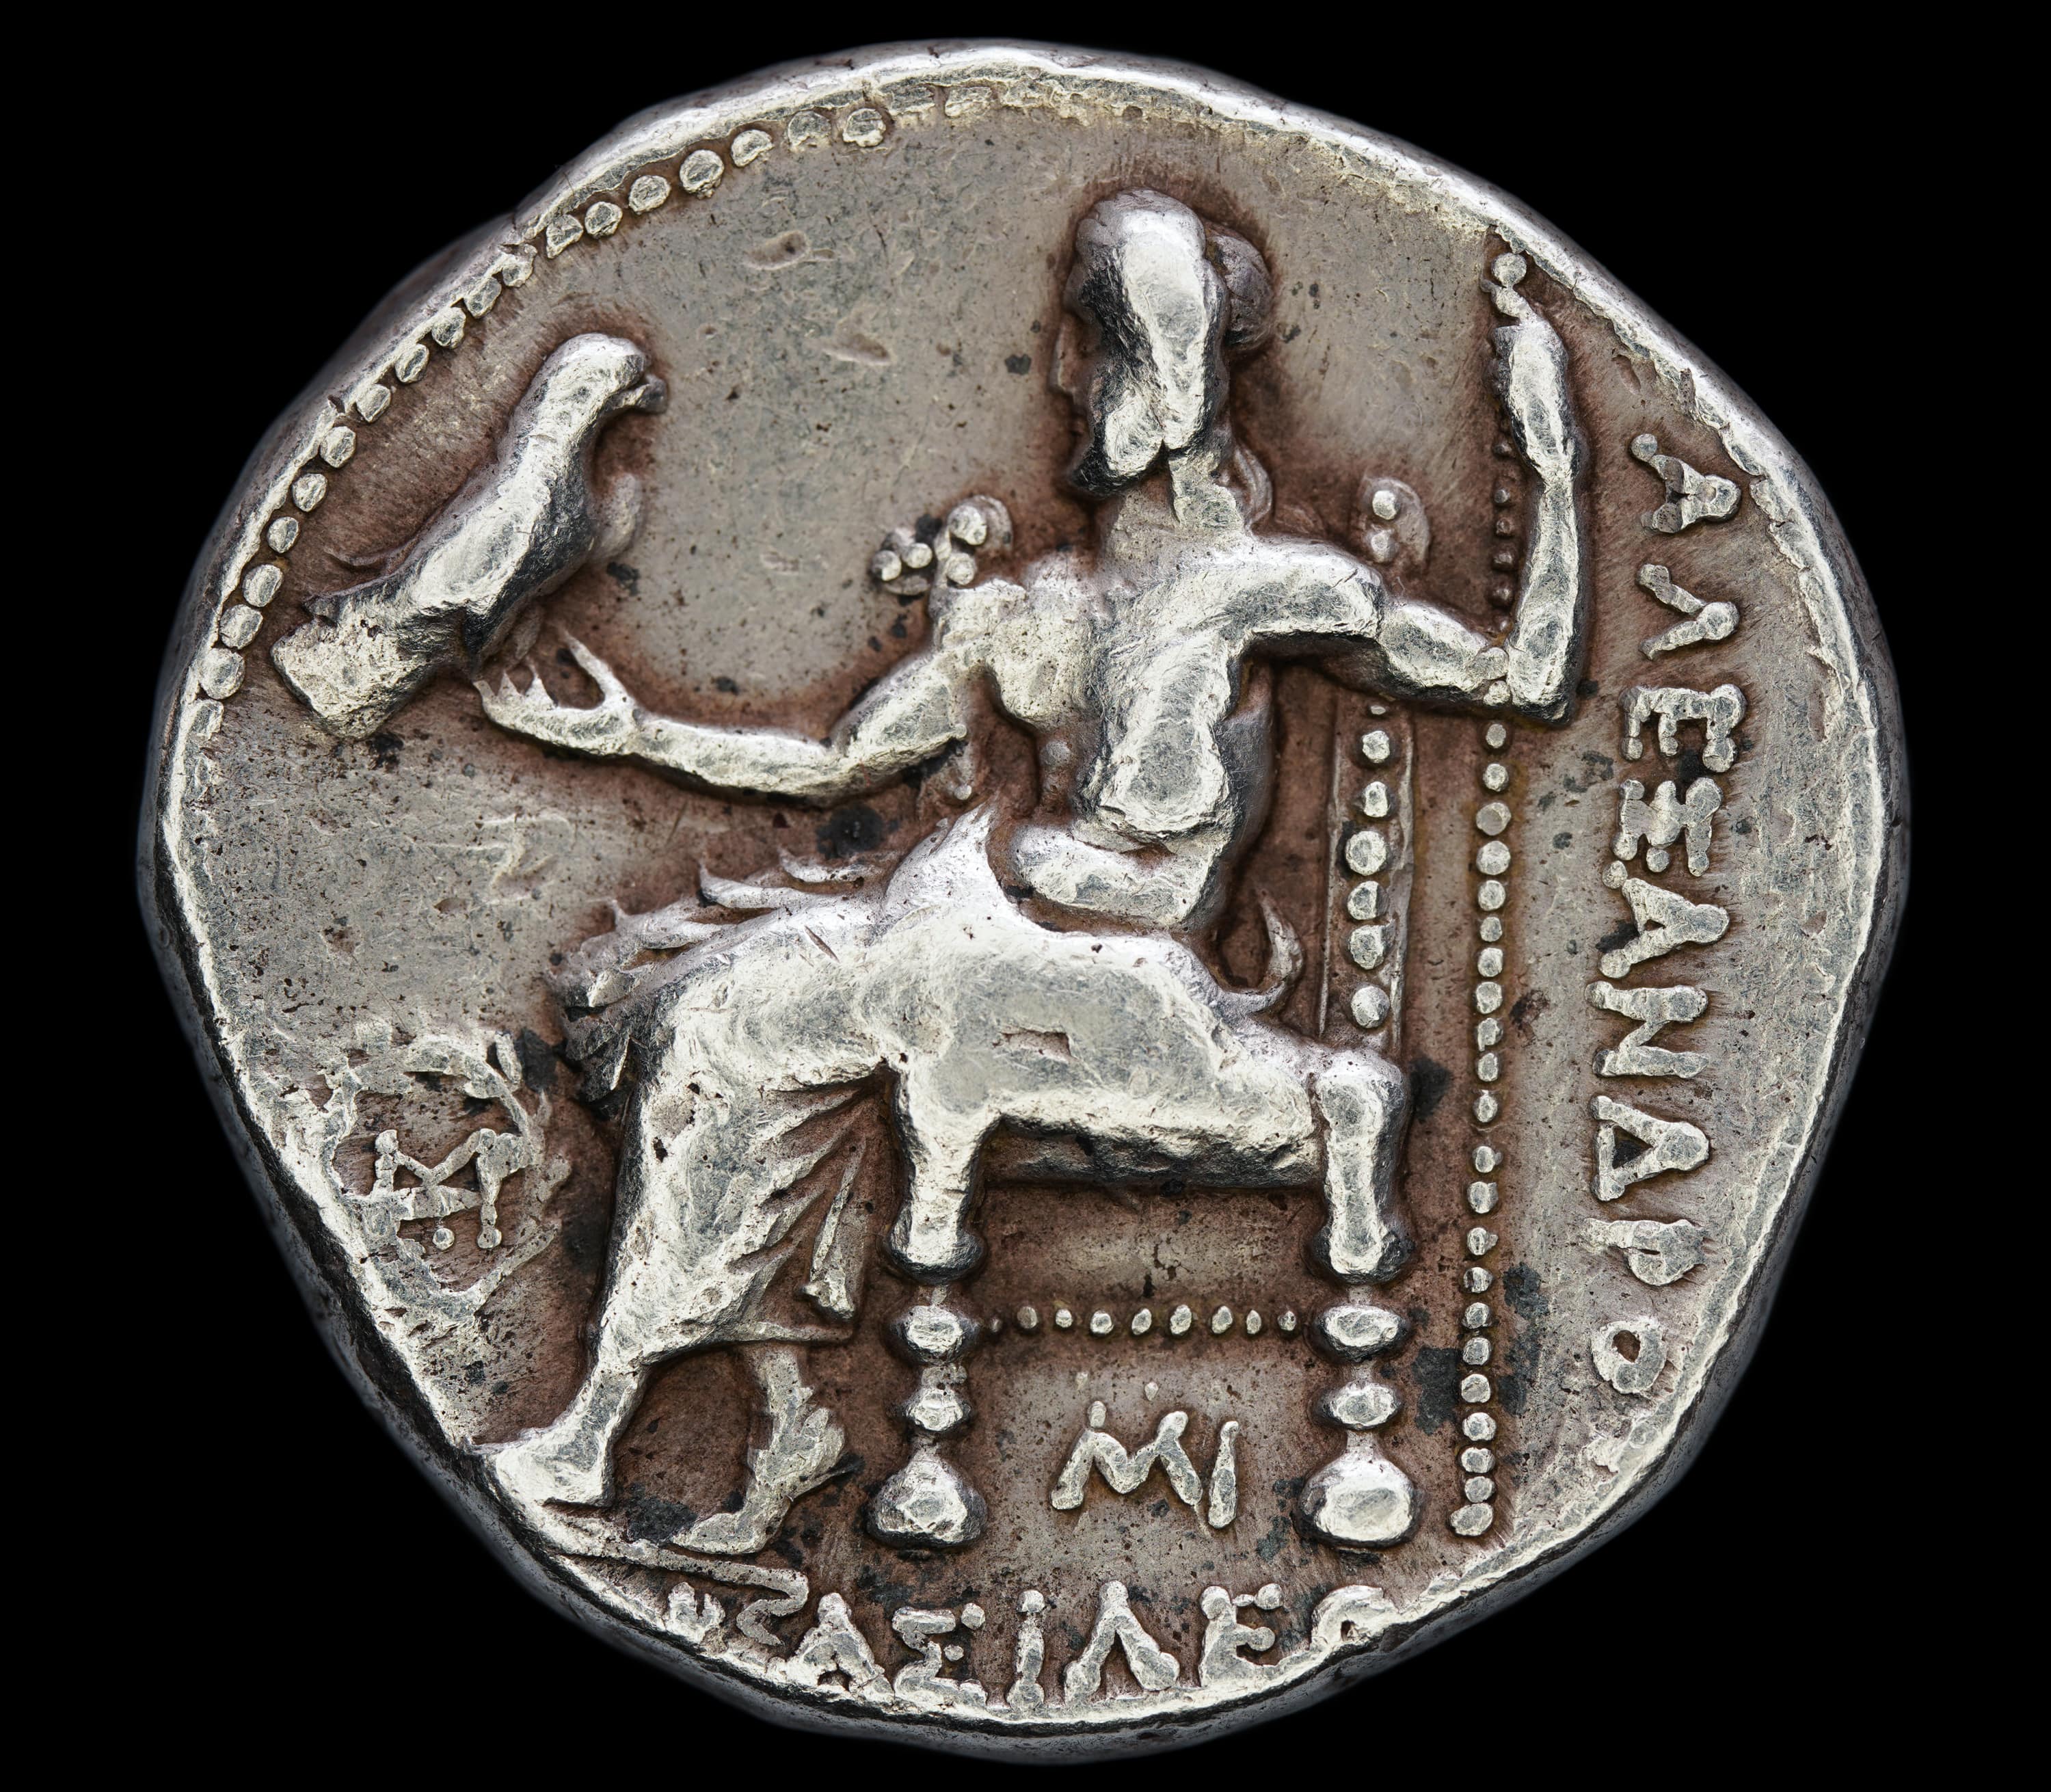
Below I will compare three different lighting arrangements: Flash only vs LED ring only vs Flash and LED ring combined. The purpose is to show how different methods of lighting can change how a coin appears, such as the toning, surface detail, or shape of a feature. It also shows that not all coins benefit from only one style of lighting – even though I photograph most coins with only an LED ring, this one benefited from having a flash act as a secondary light source.
In both comparisons below, the image on the left is being compared against the image taken with Flash and LED ring combined. The first comparison on the left shows Flash only vs the combined lighting, while the second comparison on the right shows LED ring only vs the combined lighting.
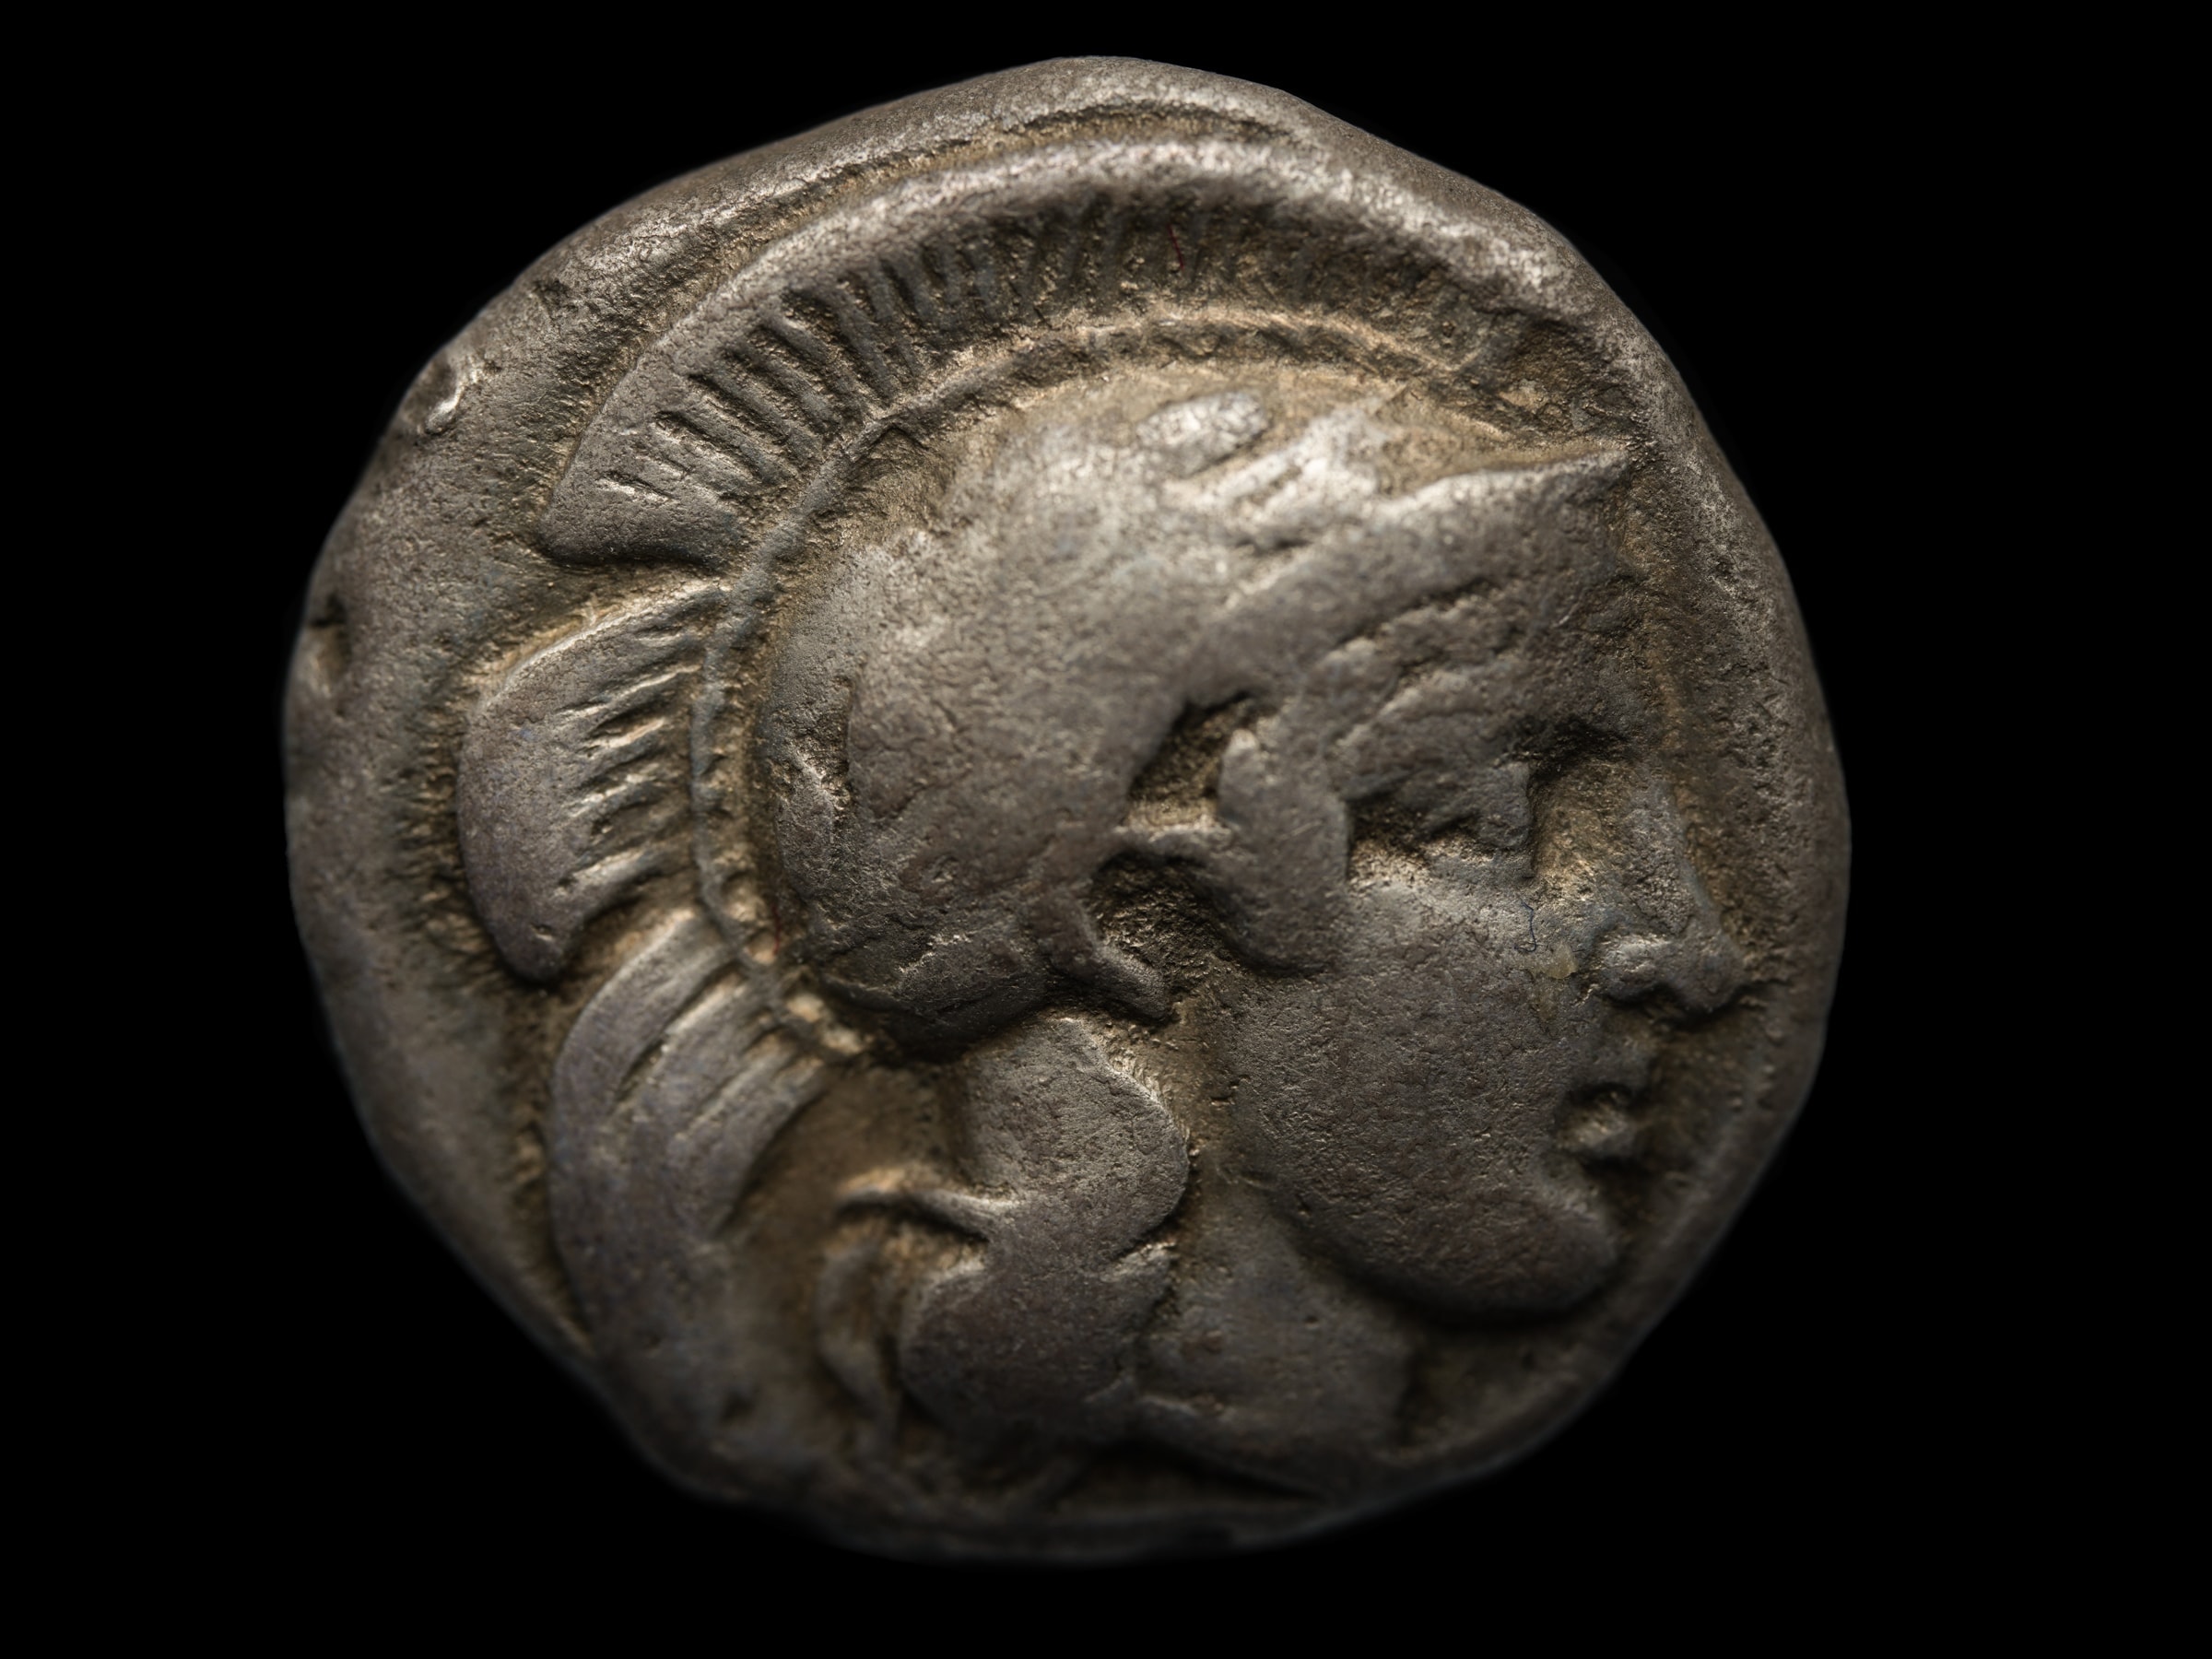
Flash only vs Flash + LED Ring. The flash is high-angled and positioned at about 12 o’clock. Its effect is not too harsh and provides good lighting and contrast at the top of the coin and showing the detail in the surfaces. However, it is not exposing the bottom half of the coin well and it also doesn’t accentuate the gold toning present on the coin. There is also strong directional lighting where it is clear that the light is coming from the top.
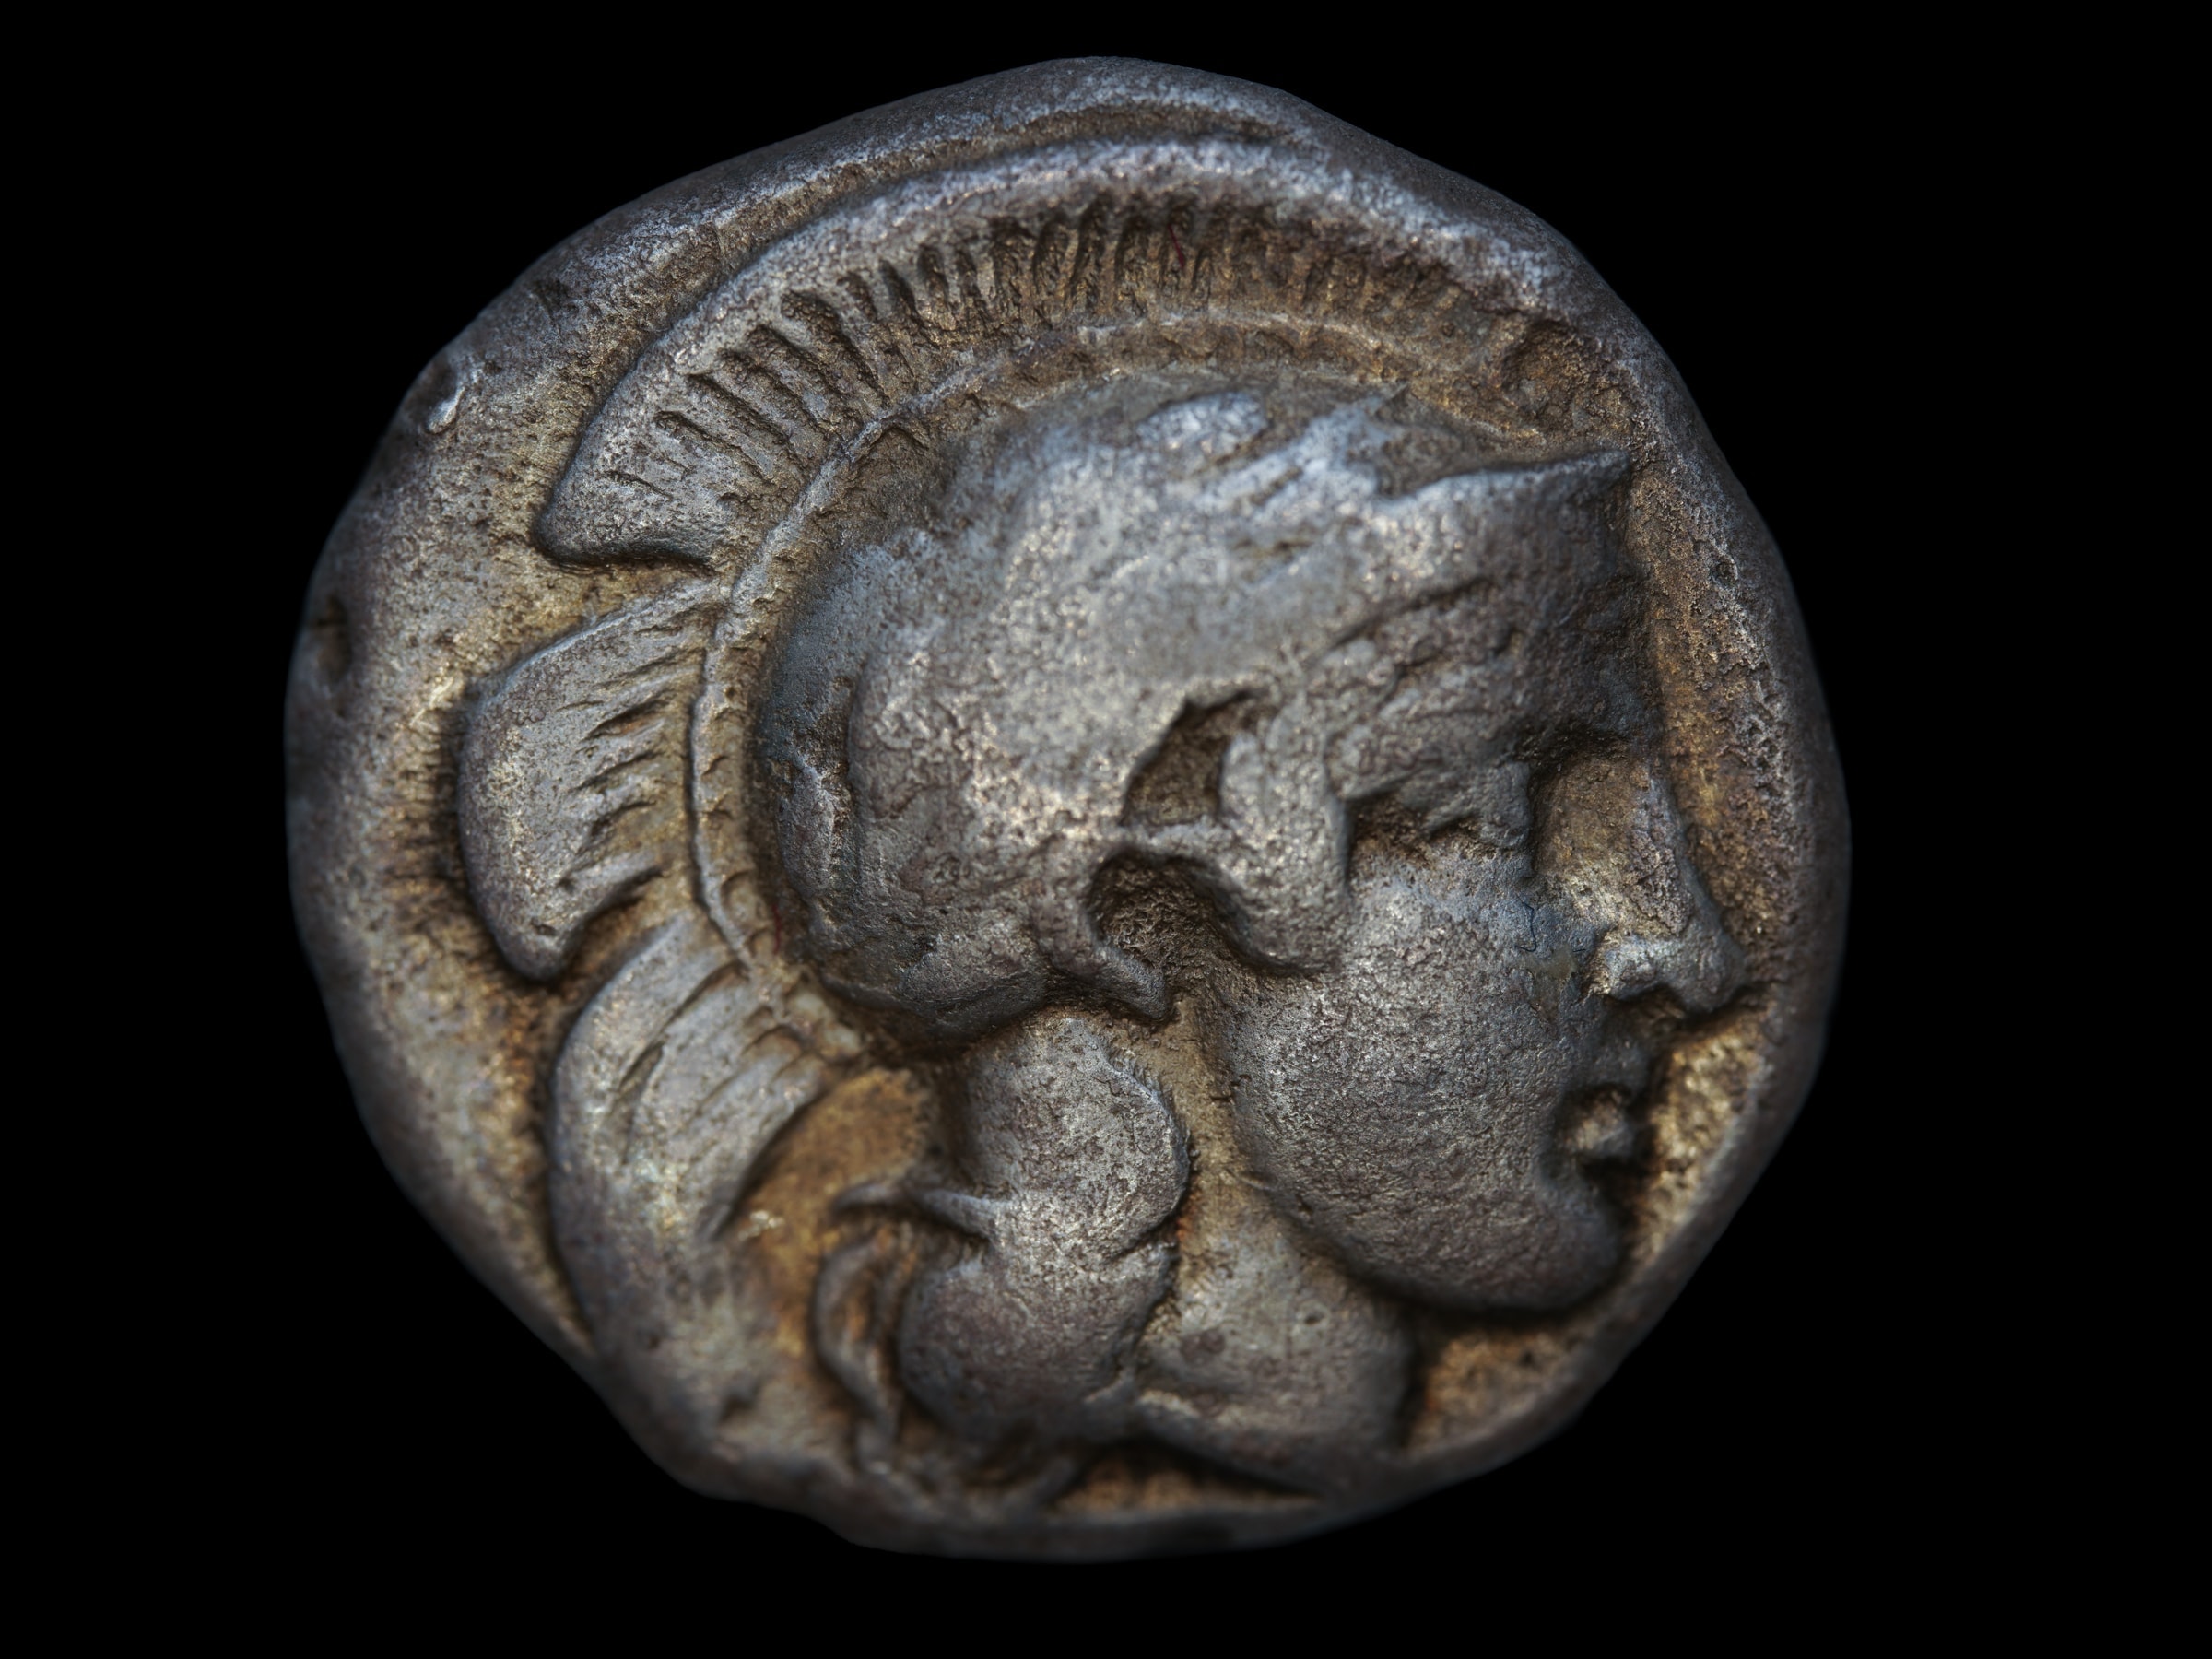
LED Ring only vs Flash + LED Ring. The coin is exposed well with only a few small spots that are overblown, e.g. where the light reflects off the high points of the relief. The contrast across the coin is excellent and the golden toning is reproduced well. Some of the surfaces are too reflective and glisten in the light, reducing detail, and the curved surfaces at the top of the helmet appear flat and lack character. Diffusing the light to reduce highlights may make the coin appear even flatter.
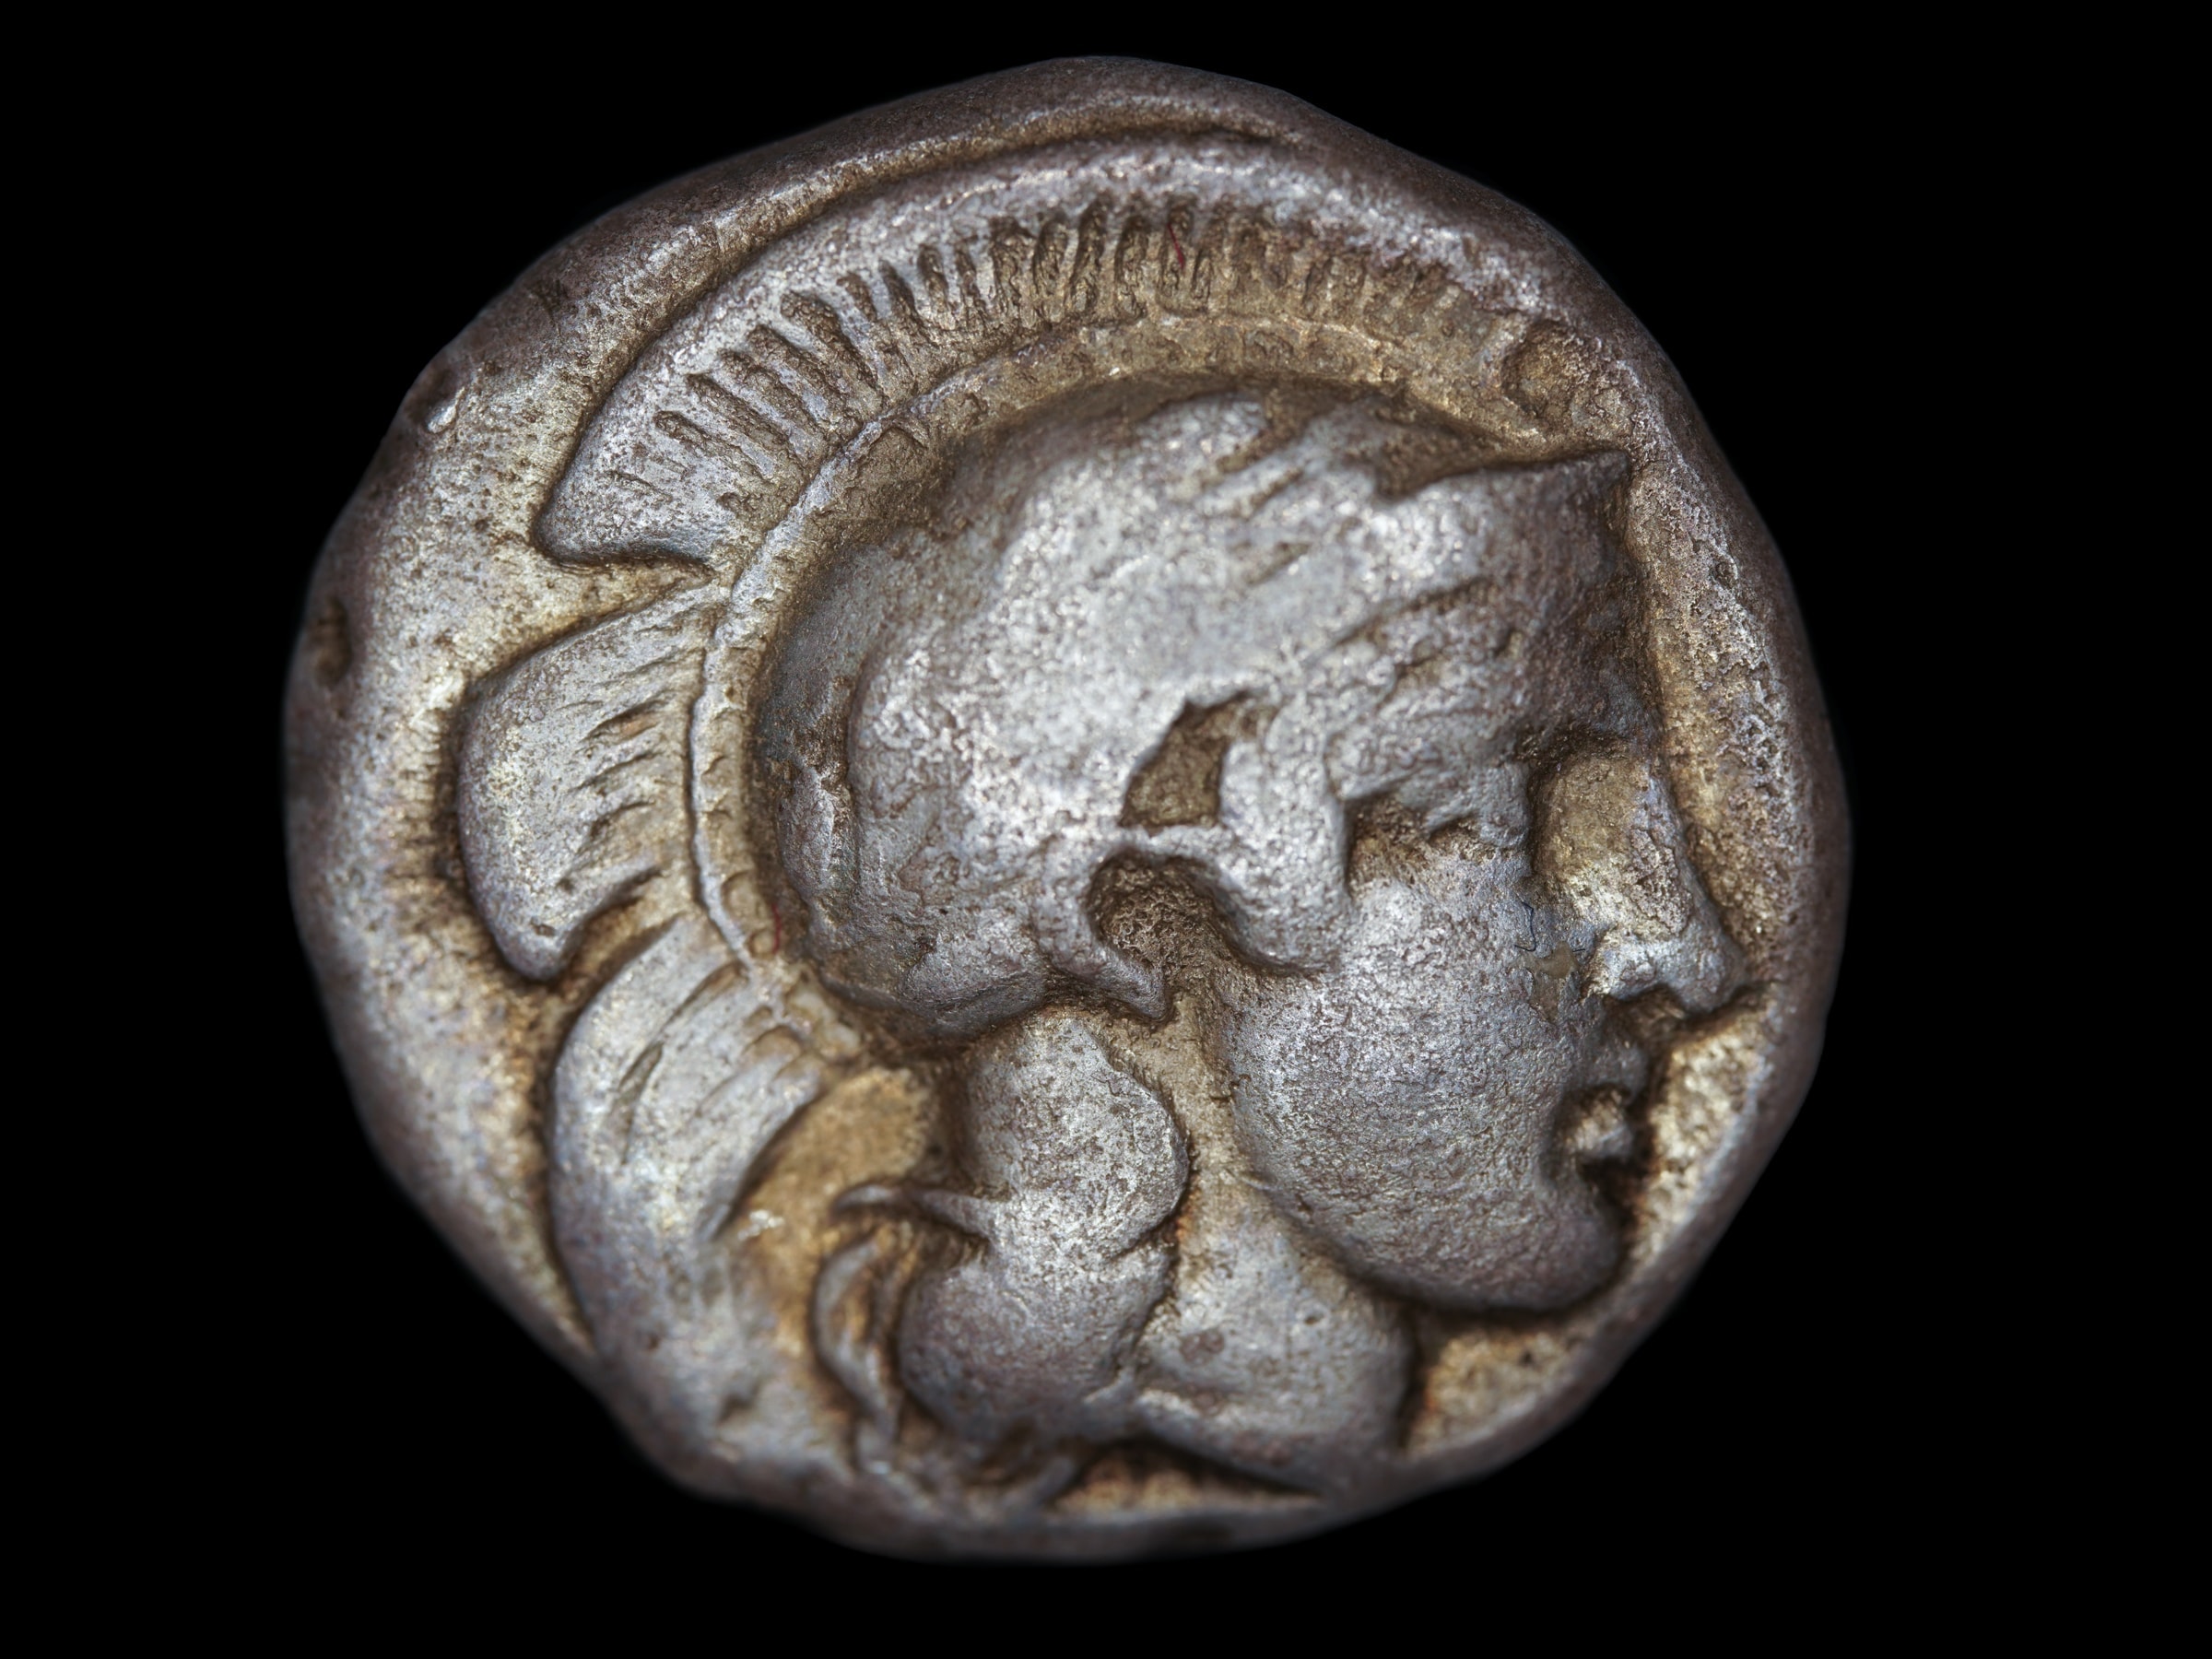
The image on the right in both comparisons is the arrangement that I went with for photographing that coin. It has both LED ring and a high-angled flash. The flash is set at a low power and the shutter speed of the camera is set relatively fast to ensure the LED ring doesn’t have too much influence on the lighting. The photo has the best of both worlds: great contrast, accentuated toning, even lighting, and a lot of detail and character in the surfaces. It is slightly underexposed and needs adjusting for white balance but is otherwise the most attractive photo of the three in my opinion.